
Saved views are an important part of the recruitment process. They allow you to keep track of records as well as build recipient lists. In this article we are going to look at the filters necessary to create the two separate saved views that will aid in the recruitment process:
1. A saved view for reviewing your new prospects
2. A saved view that will stand as the recipient list for a recruiting Email Workflow
For general instructions on using saved views, please see article here.
Create a Saved View for Reviewing New Prospects
This view, or one like it, should be the view you always start with when reviewing new prospects. This step will help you avoid reaching out to partners who are already in your program, or from having unnecessary workflow failures due to prospects not having an email address in the system.
We’ll start by adding a few necessary safeguard filters.
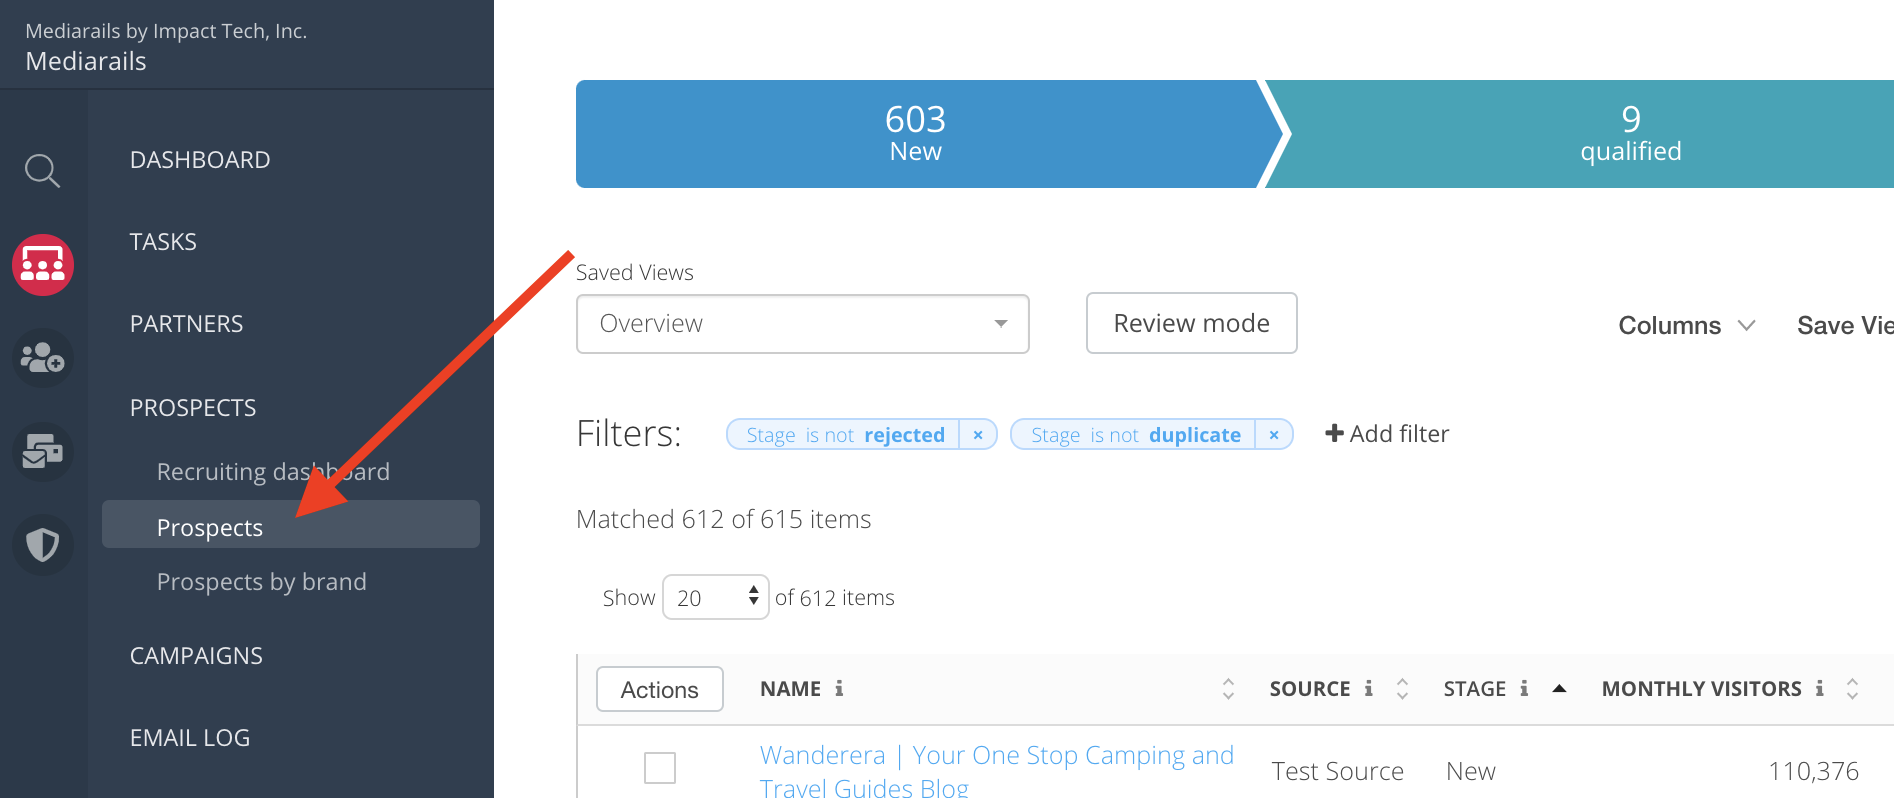
- Navigate to the Prospects list view and click the New segment on the stage bar
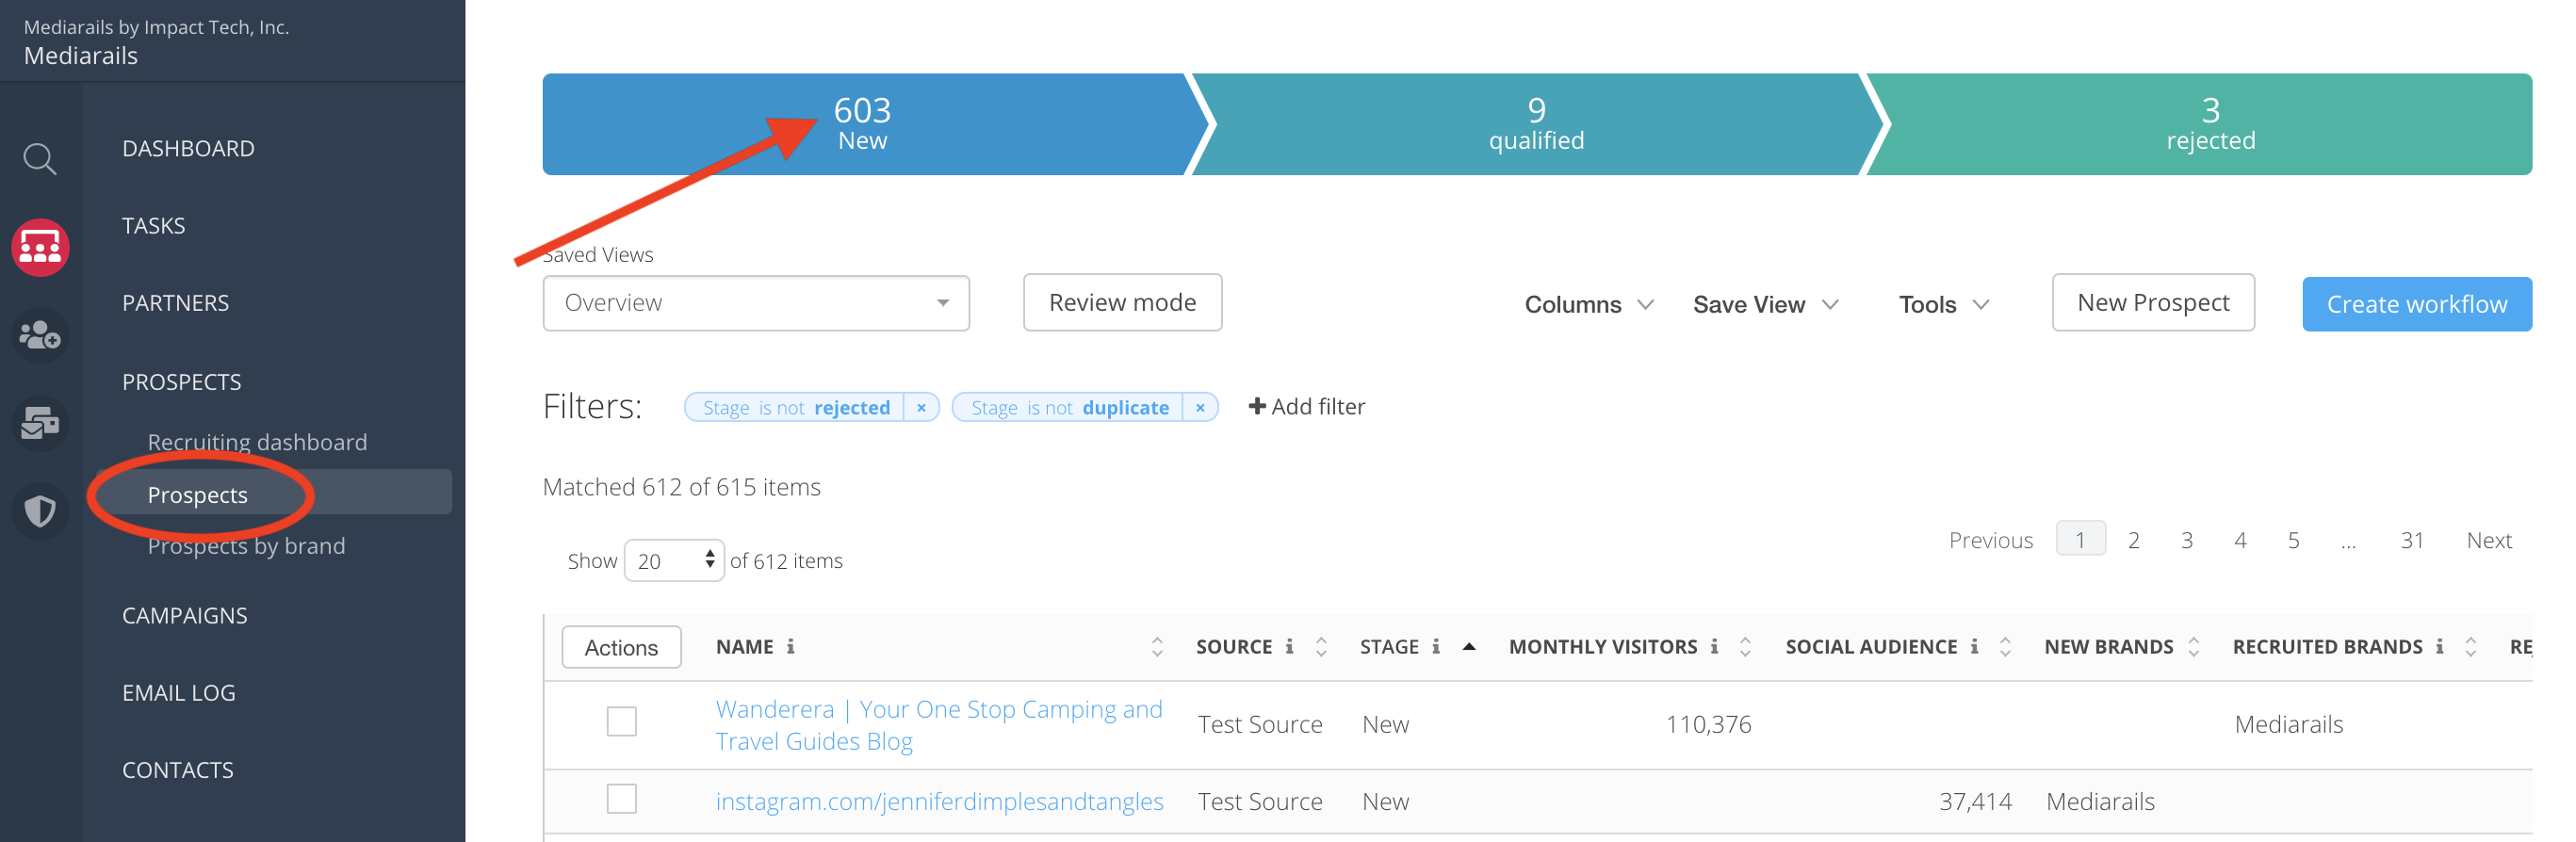
- Add the following filters, as shown in the image below:

- Stage is new - this filter will already be added since you clicked on the New stage in step 1
- Primary Contact Email is not blank - ensures that all records on this list have email addresses in the system
- Recruited Brands is not [your brand] - filters out your brand's current partners
- Rejected Brands is not [your brand] - filters out records that have been rejected for that brand
- Brands is [your brand] - if you have multiple brands, this filter will show the results that were pulled into the system for use with this particular brand. If you have only one brand, this filter is optional.
- Press the Save View button on the right:
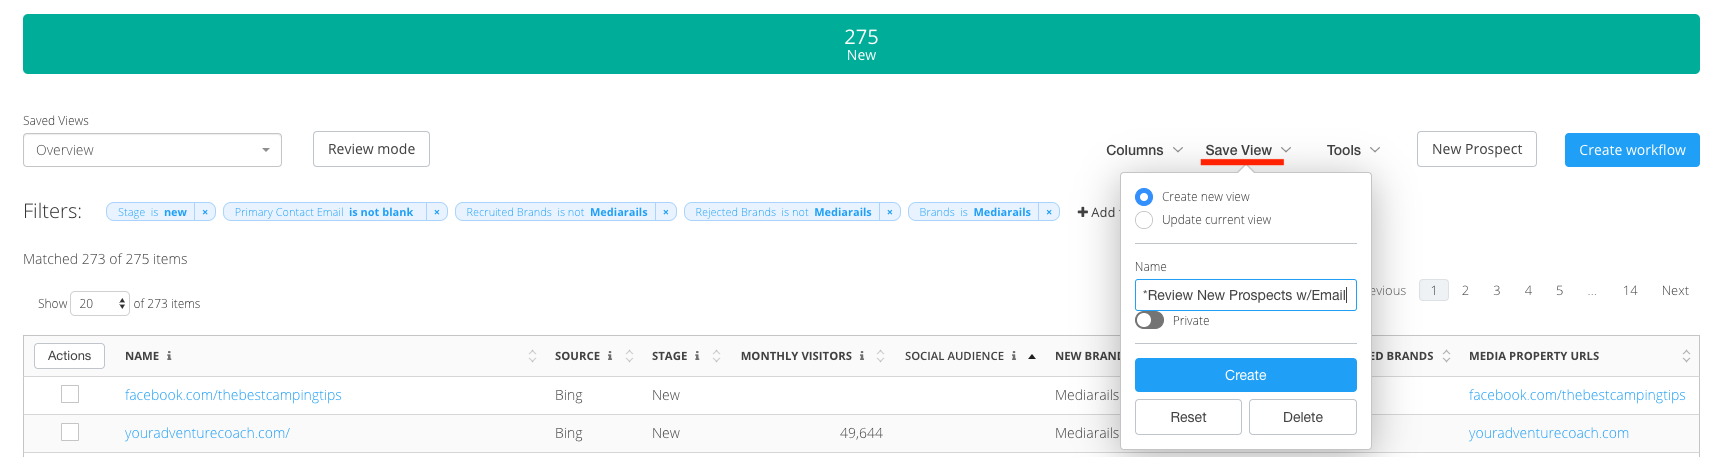
- Name your view something you will remember such as: *Review New Prospects
- Click Create on the bottom of the Save View popup to save your view
Note: Adding an asterisk (*) will bring the view to the top of the list, located on the left-hand side of the screen like shown below.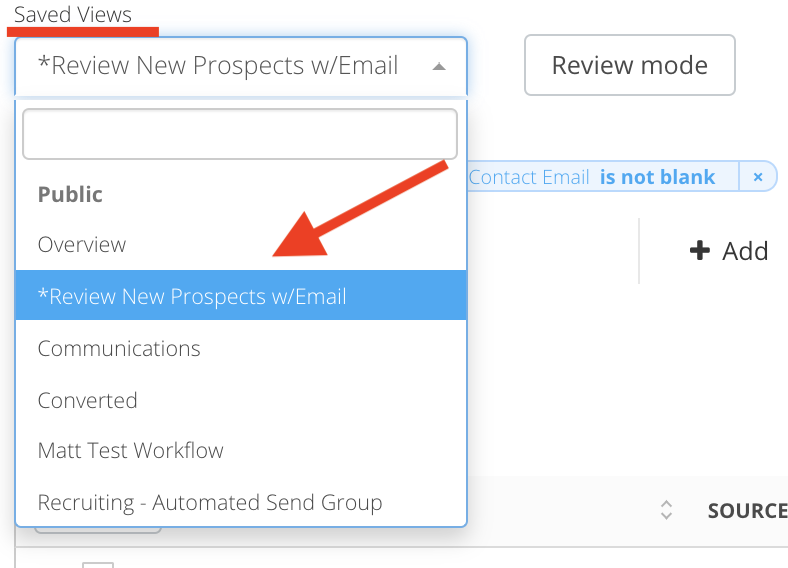
Create a Saved View for use as a recipient list in an Email Workflow
Saved views can be utilized as recipient lists for Email Workflows. Each Email Workflow should have:
- A dedicated tag
- A saved view utilizing the dedicated tag
- The saved view connected to the workflow itself
As you use Review Mode to review your prospects, you should be adding the dedicated tag to prospects that you wish to add to your email workflow. The next step is to create a saved view that incorporates the dedicated tag, which will later be connected to an email workflow. For instructions on setting up an email workflow, please see article here.
To Create a Saved View for use as a recipient list in an Email workflow follow the steps below.
- Navigate to the Prospects List View
- Add the following filters, as shown in the image below:

- Primary Contact Email is not blank - ensures that all records on this list have email addresses in the system
- Recruited Brands is not [your brand] - filters out your brand's current partners
- Rejected Brands is not [your brand] - filters out records that have been rejected for that brand
- Brands is [your brand] - if you have multiple brands, this filter(not shown in image above) will show the results that were pulled into the system for use with this particular brand. If you have only one brand, this filter is optional.
- Tags is [Recruiting - Automated] - IMPORTANT - this is the filter that pulls records with the dedicated tag into the view. Please note that I used "Recruiting - Automated" as an example, but the dedicated tag is up to the User to create so it could be anything you'd like.
For more information on creating Tags, see article here.
Comments
0 comments
Please sign in to leave a comment.