
The Mediarails Newsletter feature allows you to send out newsletters or announcements to your contacts in Mediarails. You can schedule the start time, preview your email, and send test emails from within the Newsletter section.
Newsletter Page
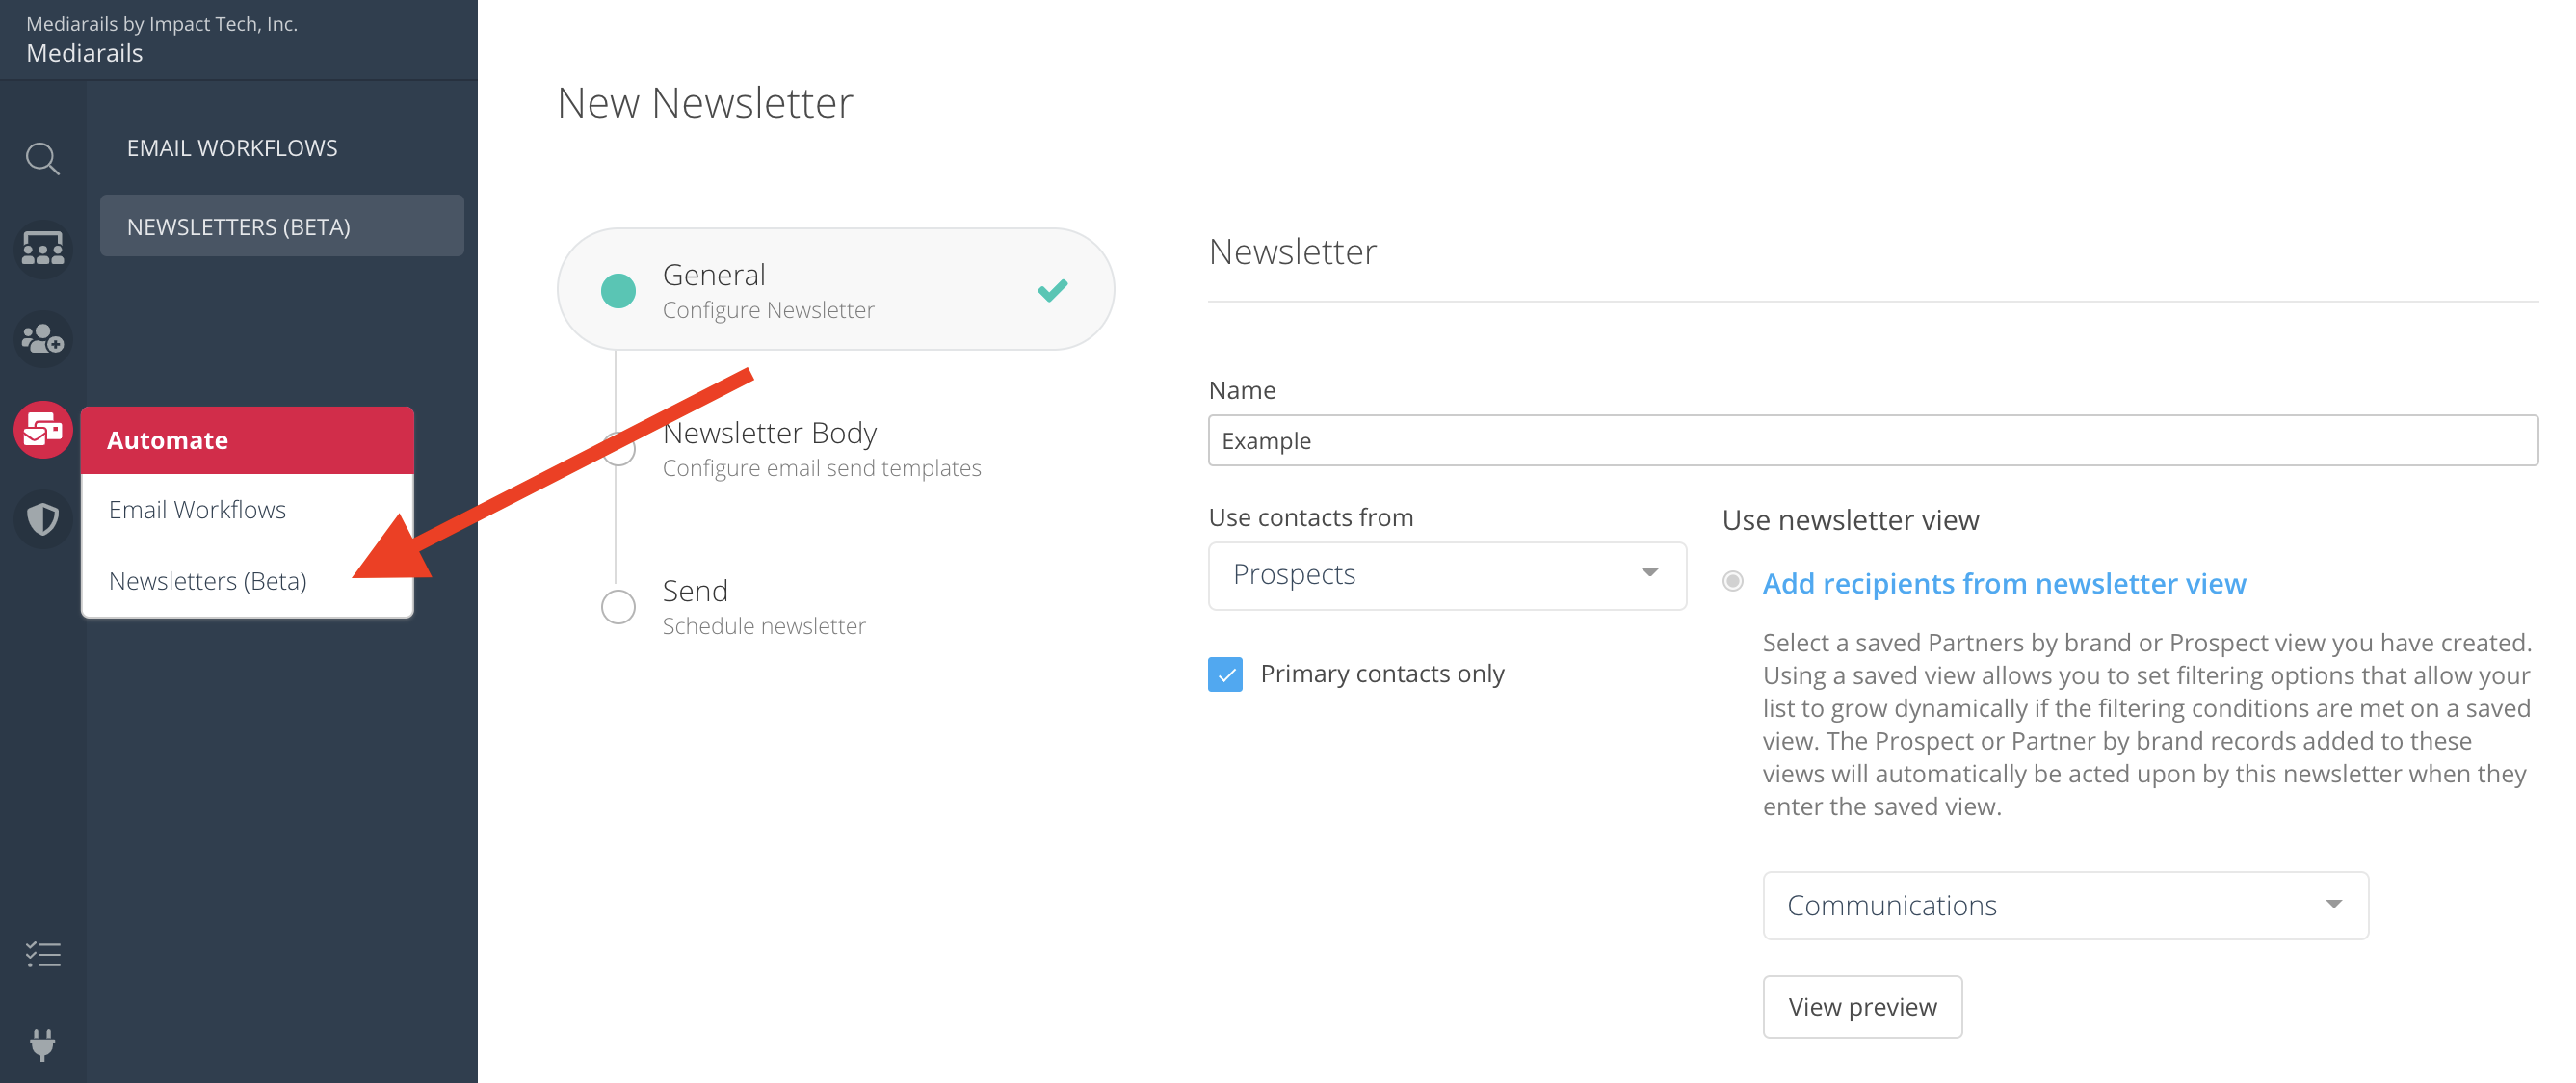
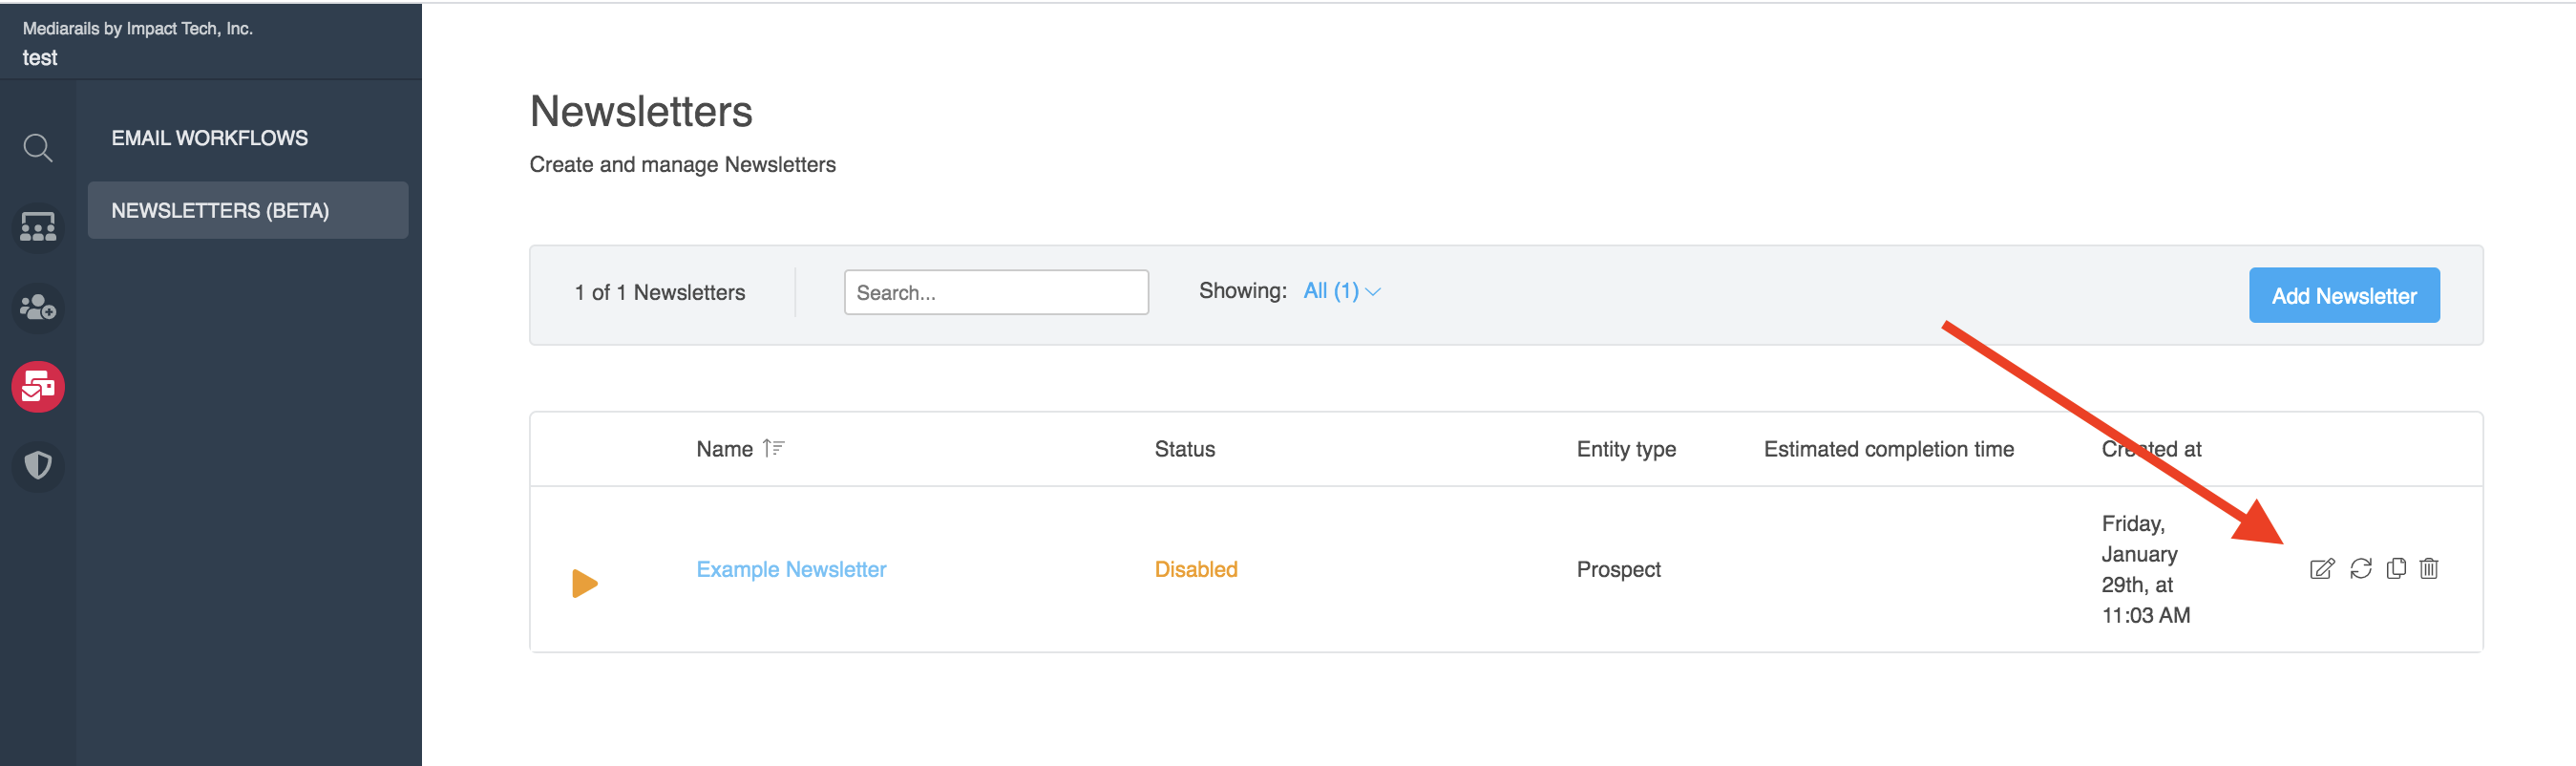
The main Newsletter page can be found in the Automate workspace by selecting Automate > Newsletters from the left sidebar, like shown below.
How to Setup a Newsletter
Important: To be able to send emails from Mediarails your email address will first need to be connected to the system. Please see the instructions for connecting your email.
Step 1: Add Newsletter
To begin the setup of a newsletter, click on the Add Newsletter button on the right side of the main Newsletter page, as shown below.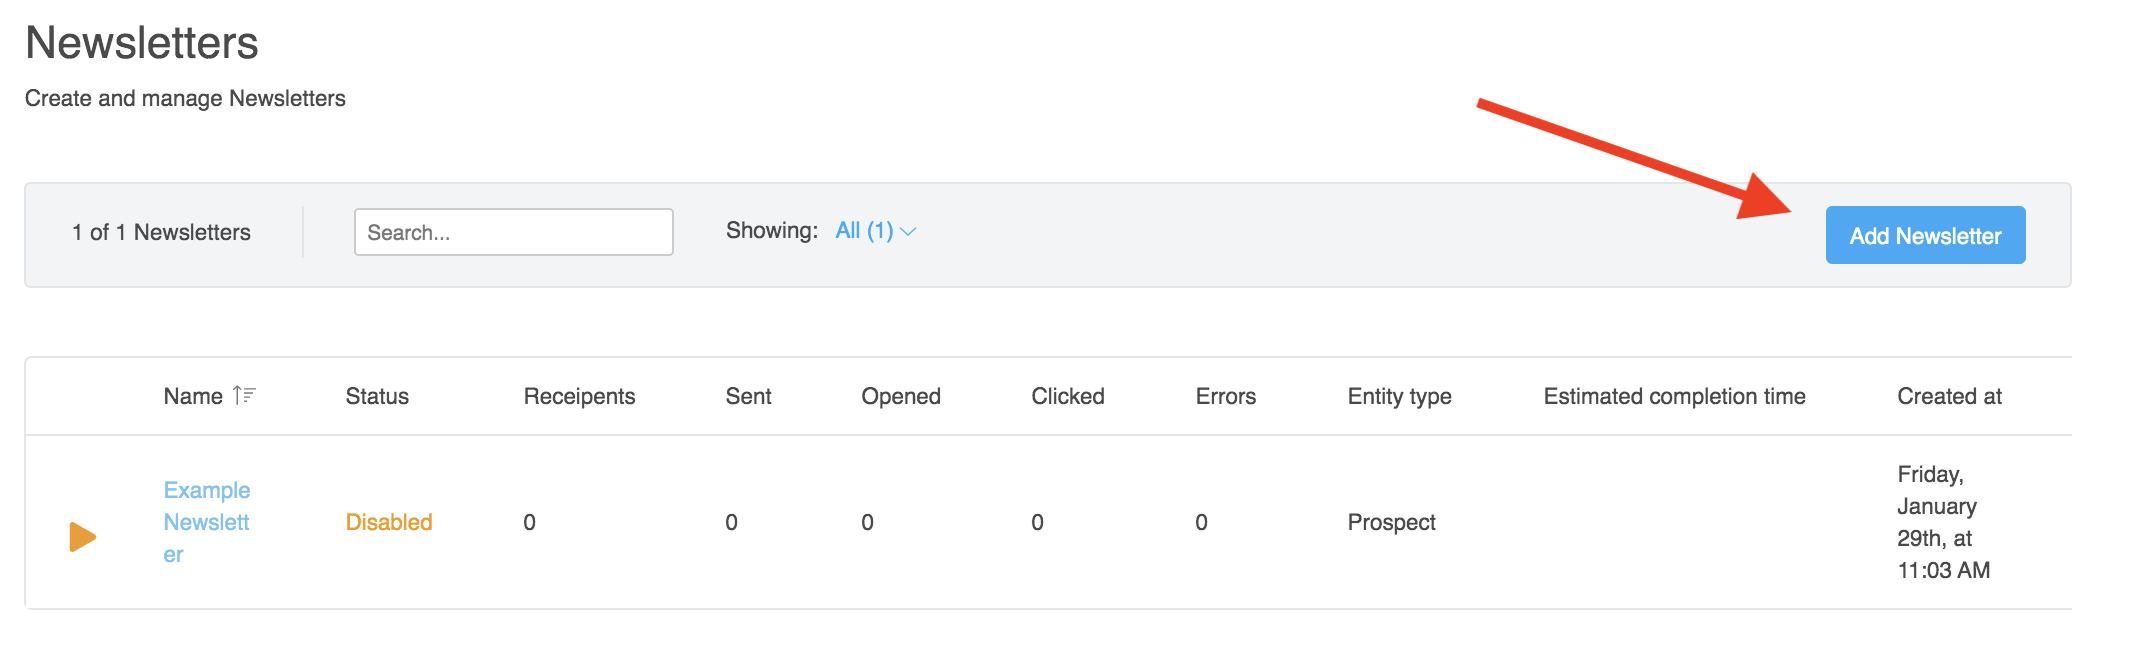
Step 2: Configure General Settings
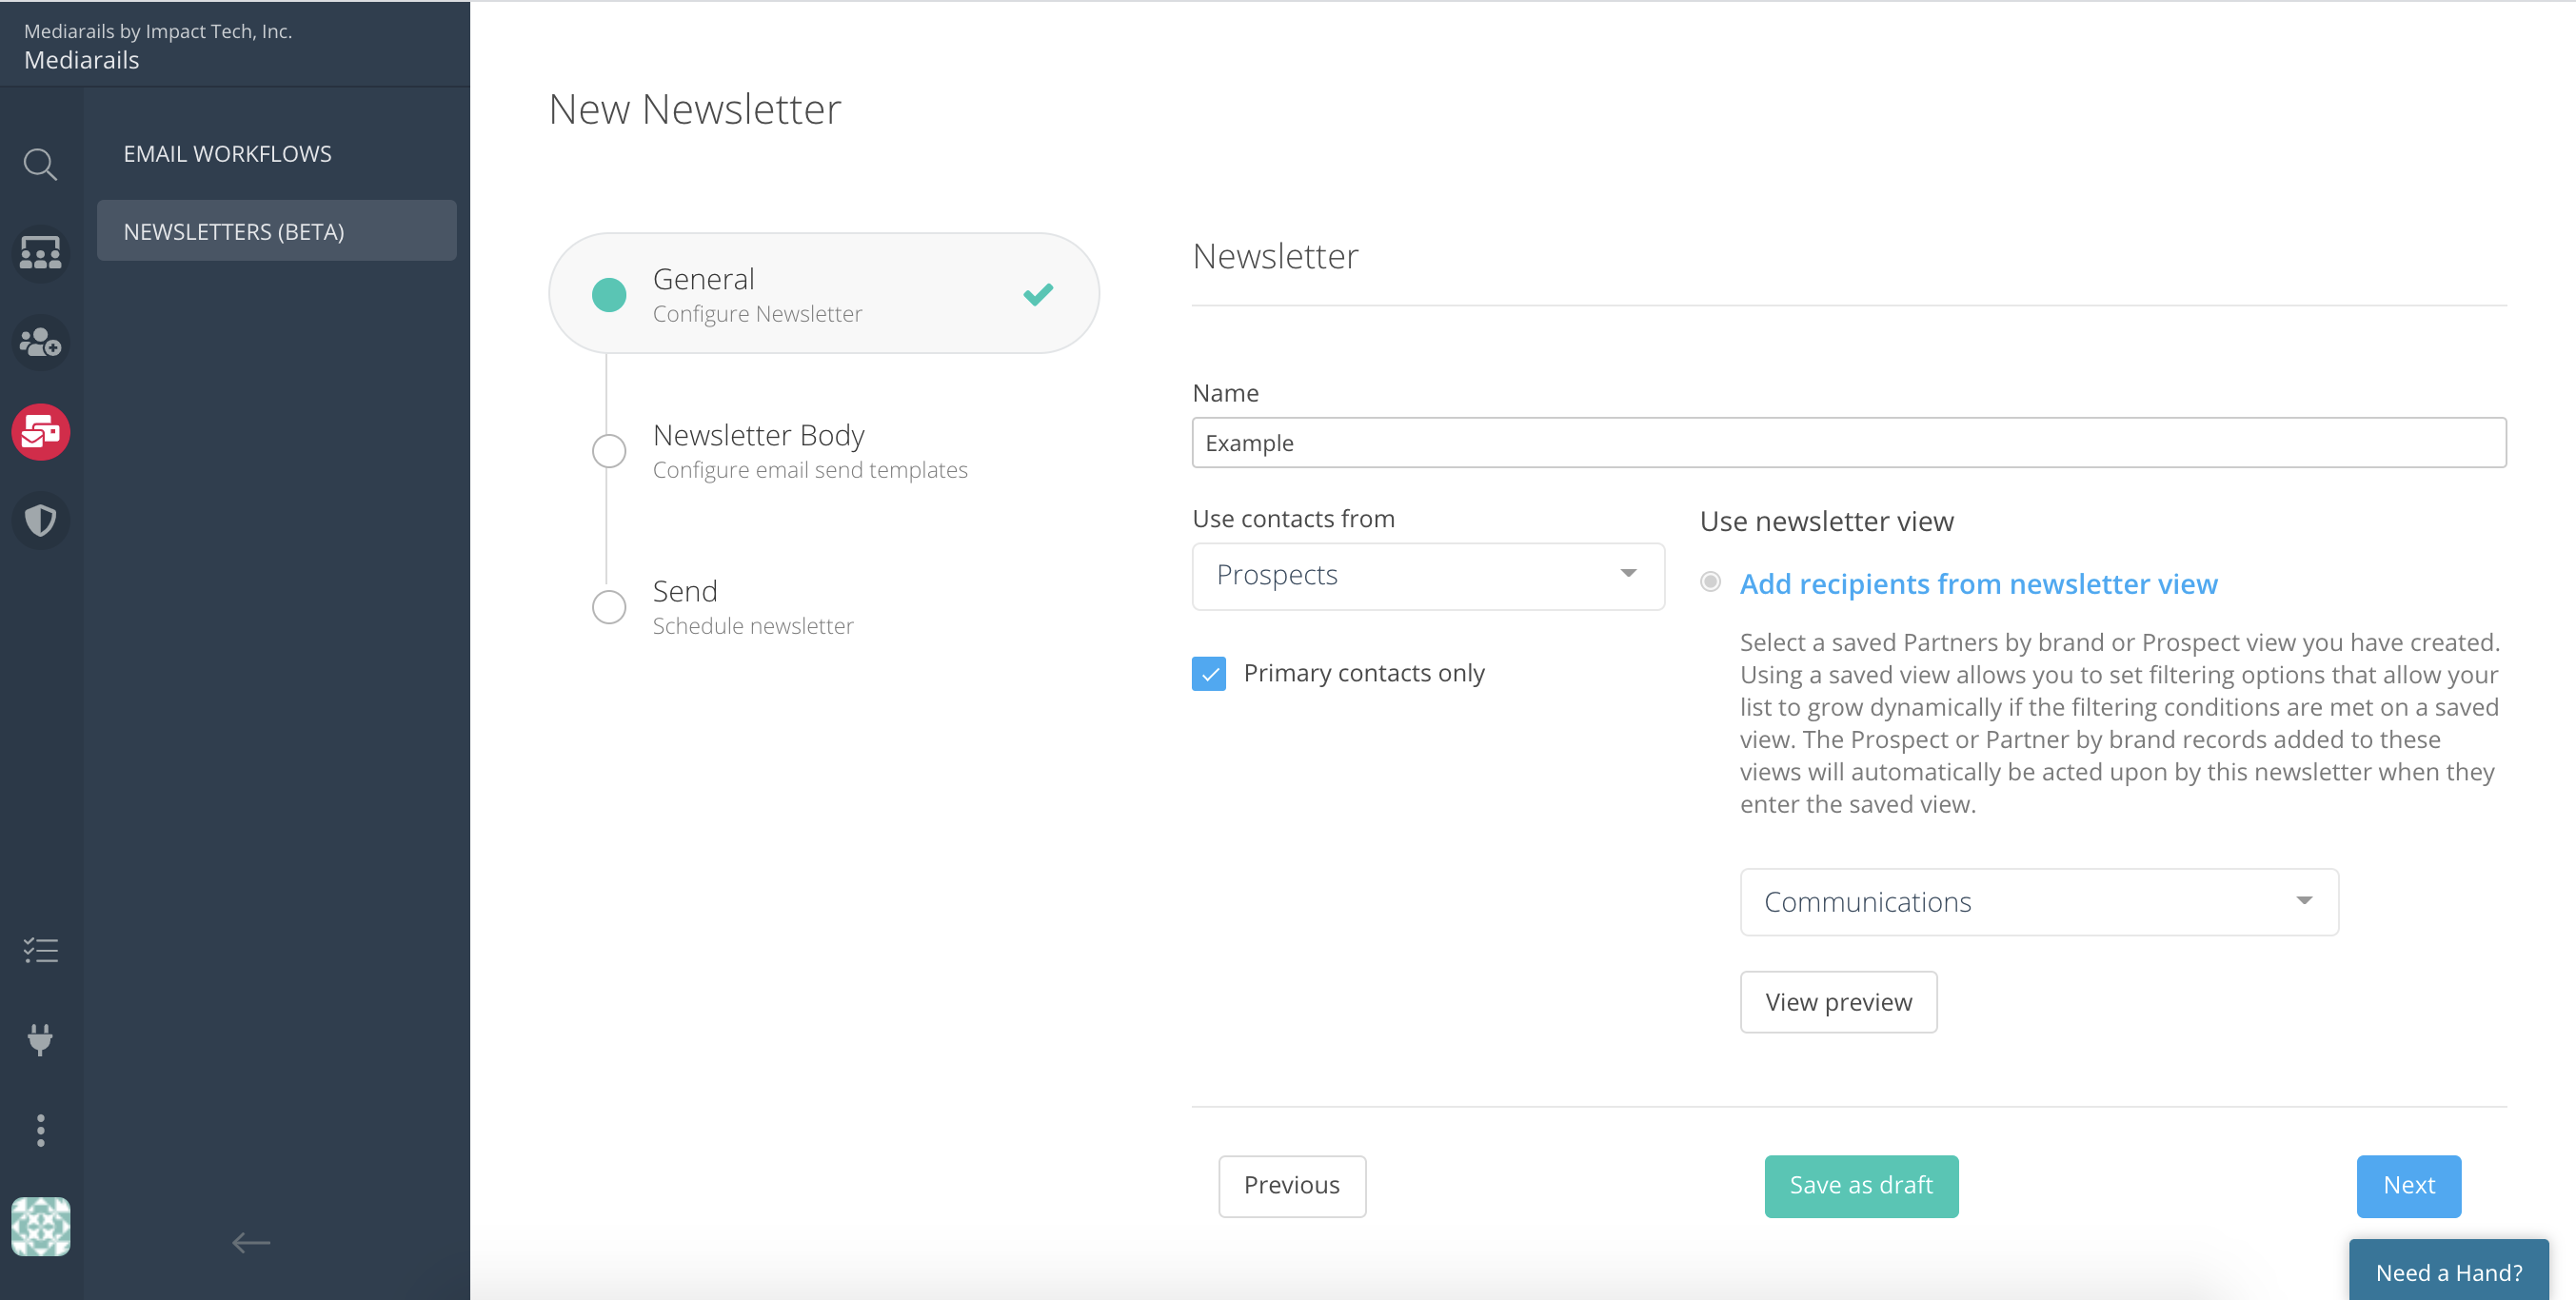
There are three tabs on the Newsletter setup screen, the first is General settings. See below for descriptions of each field.
- Name: The name of your newsletter. This name only exists internally within Mediarails, no recipients will see this name.
- Use Contacts From: Select the workspace from which the recipients will be pulled (Prospects, Partners, Prospects by brand, or Partners by brand). Please note, this selection cannot be changed after saving.
- Primary Contacts Only: Select whether you want the newsletter to go out to only the primary contact of a record, or all contacts of a record. For example, a Partner record may have the email addresses of ten contacts within the company, but only one is the primary contact. This choice designates whether your email would go out to only the primary contact, or all 10 contacts.
- Use Newsletter View: Select the Saved View that incorporates the records you would like to use as recipients. To learn more about Saved Views, see the article How to Manage a Saved View.
- Note: Newsletters will send to recipients who are present on the view at the time of activation. Records added to the view after activation will not be sent to.
Step 3: Edit the Newsletter body
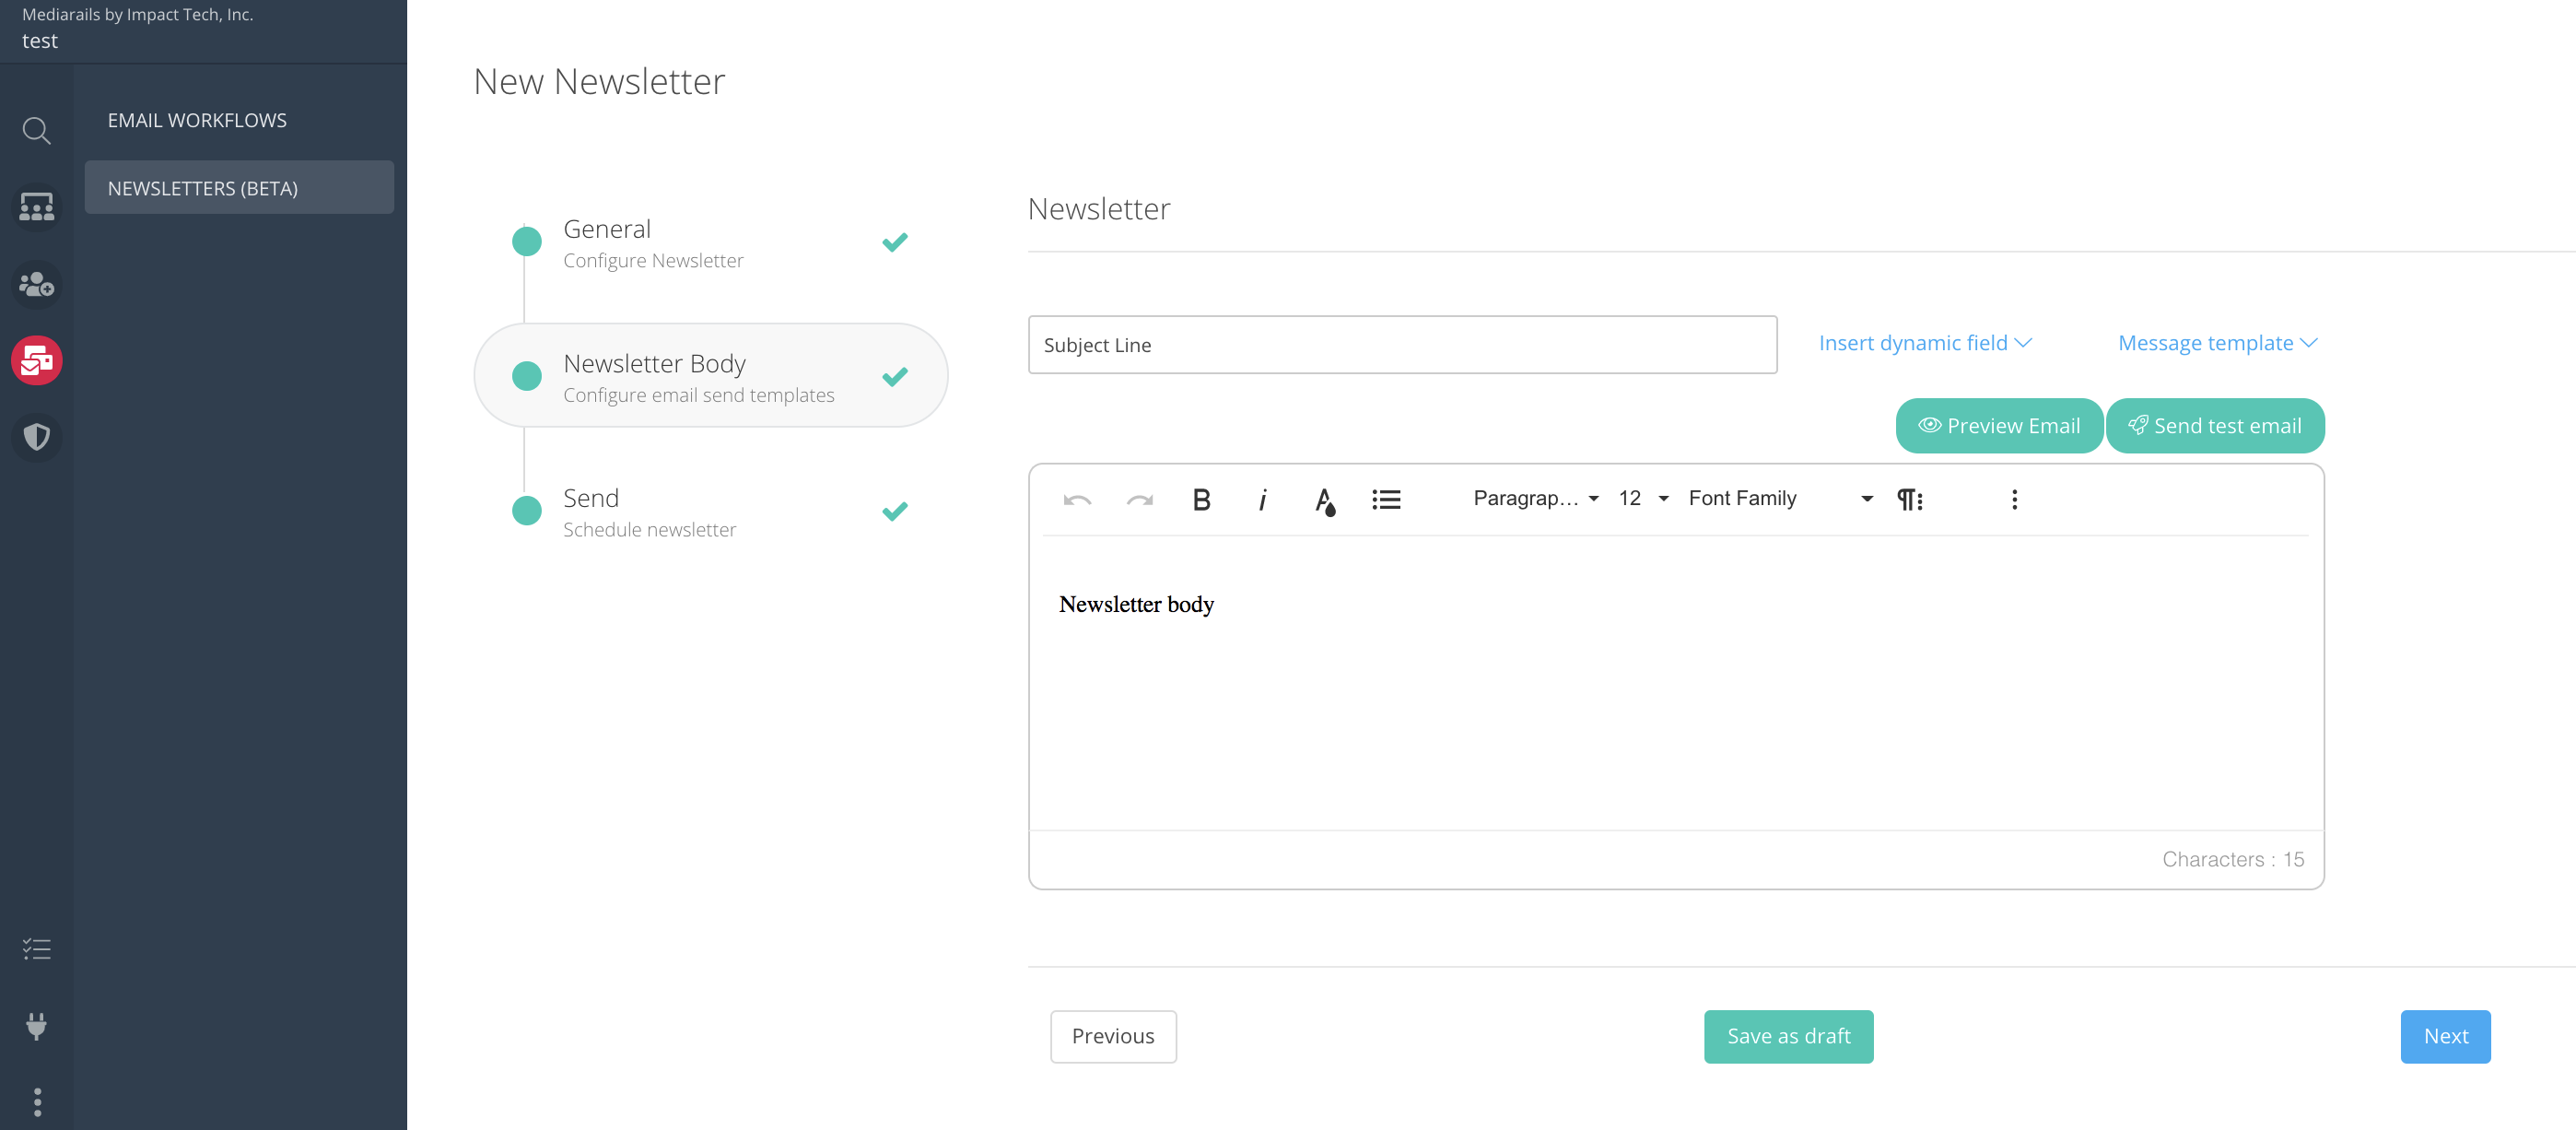
The second tab of setup is where you can edit the subject line and body. See below for more details.
- Add a subject line at the top of the screen. This is the subject line recipients will see.
- Select the BCC/CC option to copy additional contacts on all emails.
- Use the text box to write and edit your newsletter body.
- Save your draft before leaving this screen by clicking the Save as Draft button in the bottom center of the text editor. Mediarails does NOT save drafts automatically.
Using the Text Editor
The text editor is a standard editor with options for font, font size and color, bullets, and text alignment. See details below for more info on using the text editor.
- To preview your email or send a test email, select the respective buttons on the top right of the text editor.

- To insert dynamic content or use a template, select the dropdowns to the right of the subject line, and select your desired dynamic field or message template.

- To add custom HTML, select the three dot icon and then select the <> icon to enter the Code View.

- To add emojis, images, hyperlinks, or tables, select the three dot icon to access the options for each.

Step 4: Schedule Start Date
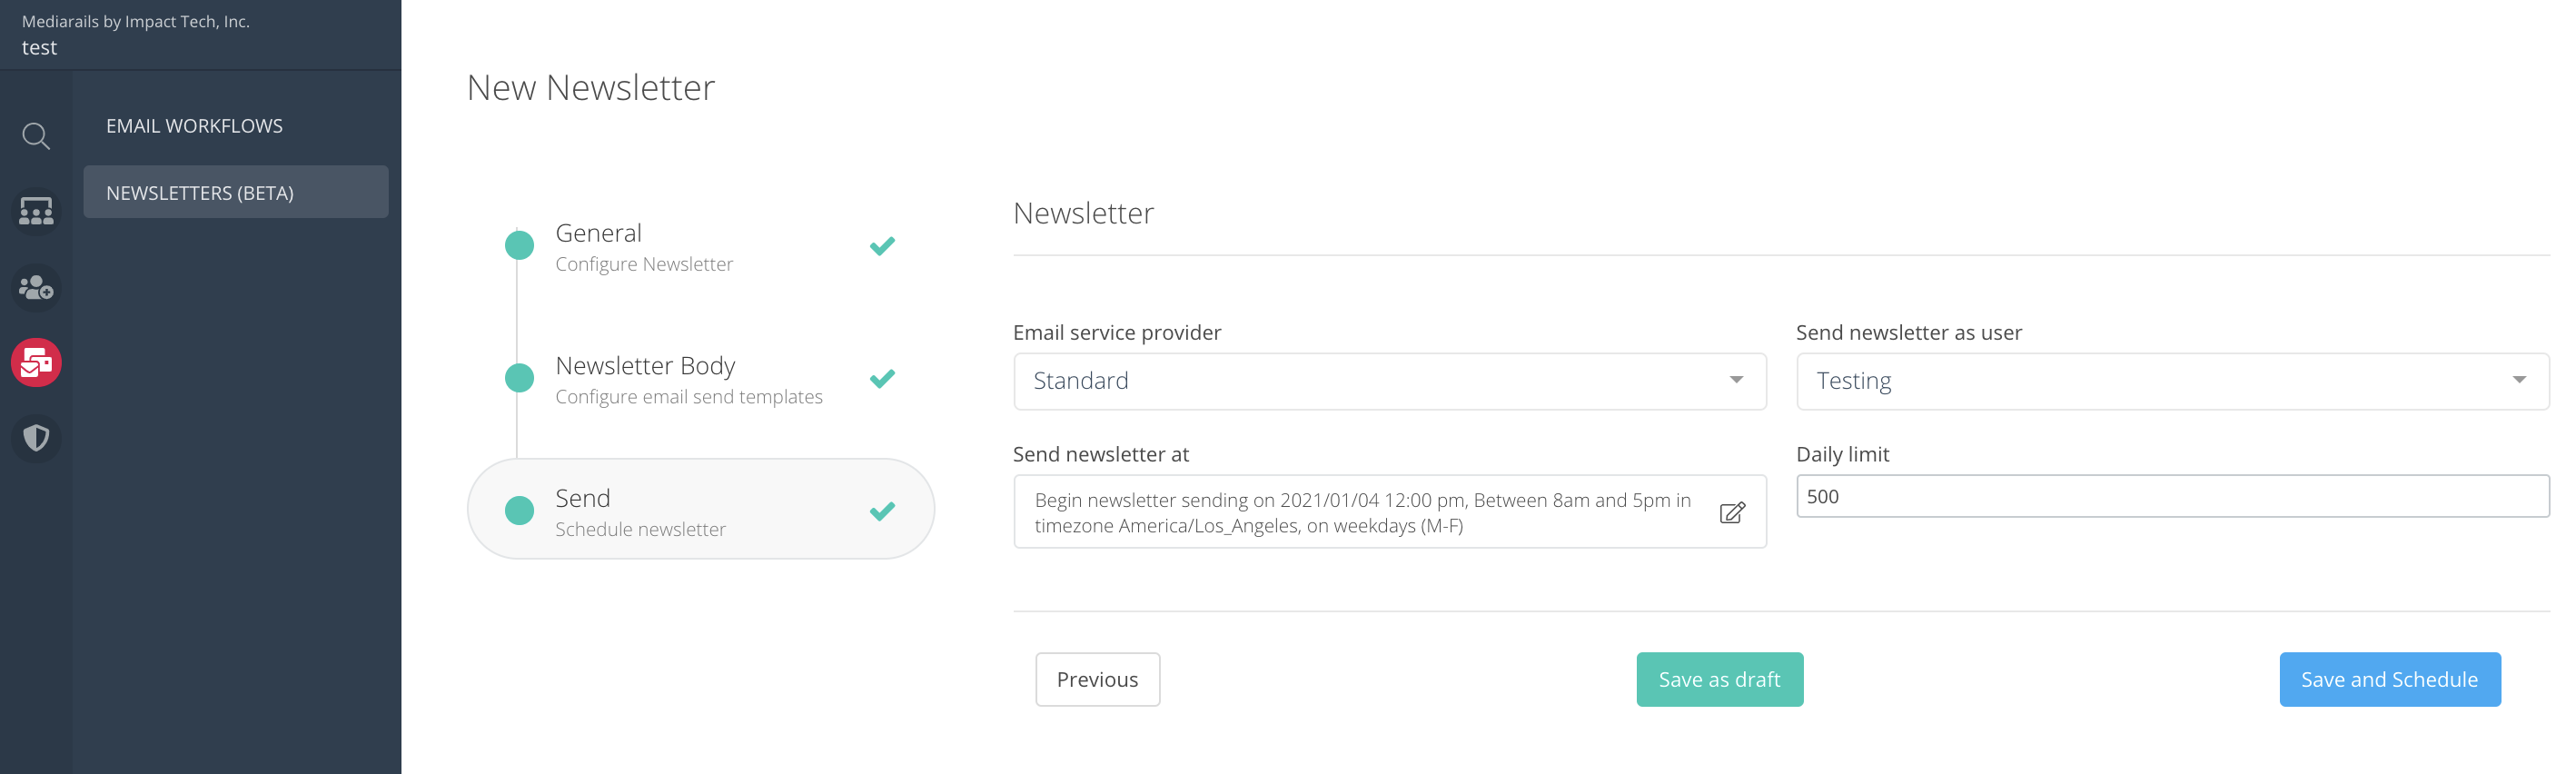
The third tab of setup is where you can schedule the date you want your newsletter to start sending. See below for descriptions of each field.
- Email service provider: This will almost always be set as standard.
- Send newsletter as user: Select the user whose email address you would like the emails to be sent from.
- Send newsletter at: This is where you will schedule a start date, as well as the days and times that you wish the email to send until all recipients have received the message. To send immediately, see section below titled "Send Now Button".
- Daily Limit: This is the max number of emails that will be sent per day. This field will help you avoid getting flagged as spam by your email provider. If you need to send more than 500 emails in a single day, please check with your IT team to make sure that your email provider allows mass sends.
Send Now Button
The Send Now button enables you to send newsletters out immediately, without waiting for the system to trickle through the normal scheduling process.
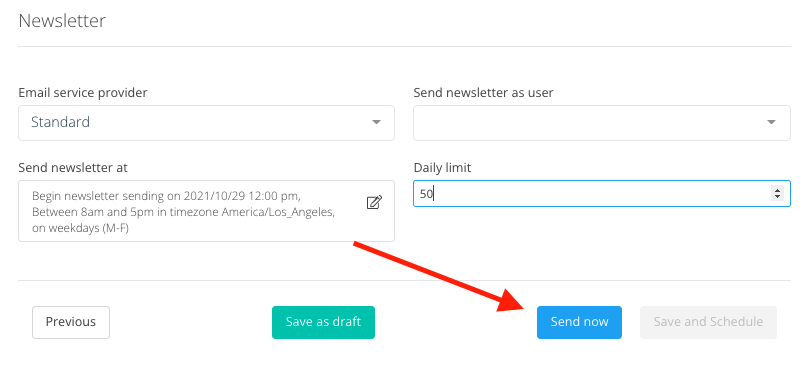
The system's scheduling process is suggested to reduce your risk of being flagged as SPAM. The system sends messages out in a randomized method to mimic human behavior, so your email provider does not flag your domain for mass sends. Using the Send Now button will bypass this system to allow you to send out emails immediately.
Please note, that the Send Now button is still subject to the daily limit of messages that you selected in the step above. If you set your daily limit to 50 and select the Send Now button, 50 emails would be sent immediately and any additional messages would be sent over the next scheduled day(s).
Step 5 : Save the Newsletter
Make sure to save the newsletter before leaving the page pictured above. To do so, select the Save and Schedule button on the bottom right of the screen. This saves the steps of setup you have completed, but does not activate the email. To activate the newsletter to begin sending, see the following section on how to Enable or Disable a Newsletter.
Managing Newsletters
Enable or Disable a Newsletter
When you are ready to activate your email, select the Play button on the main Newsletter screen (see image below). To disable the newsletter, press the same button, which will look like a Pause icon on any active newsletters.
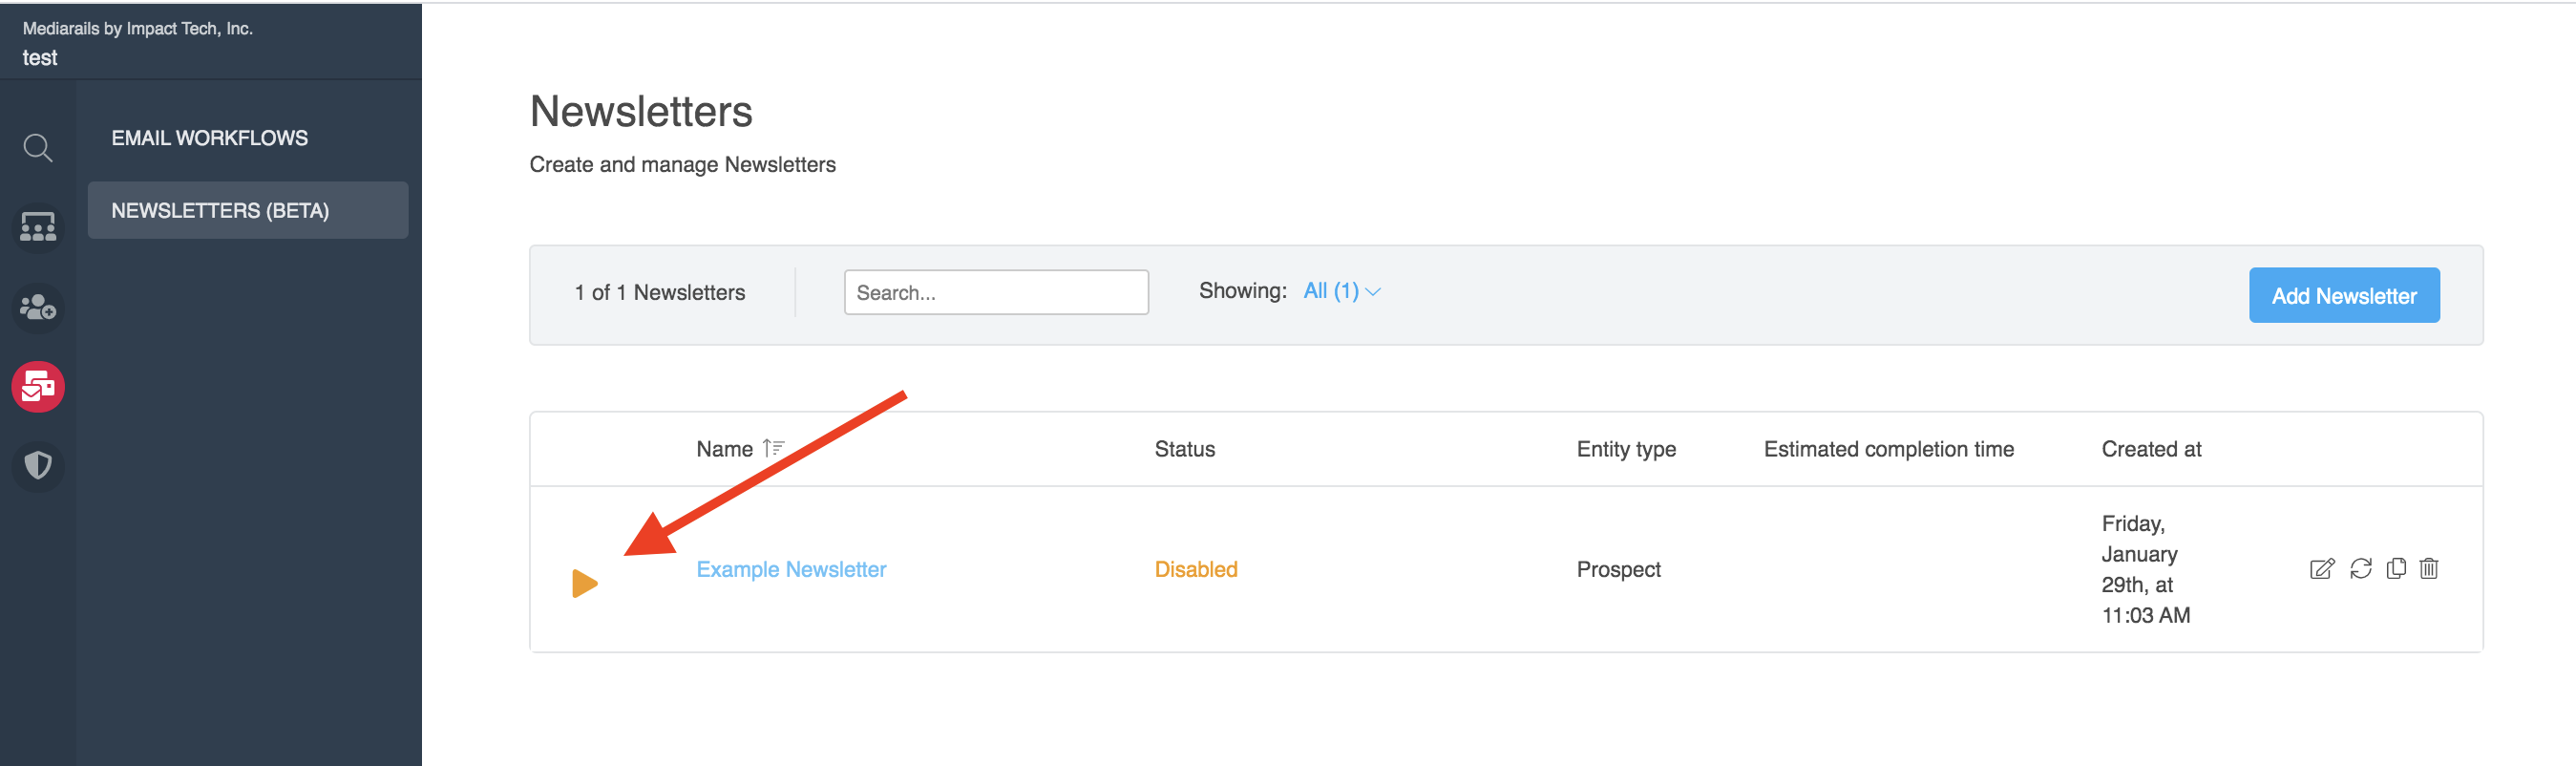
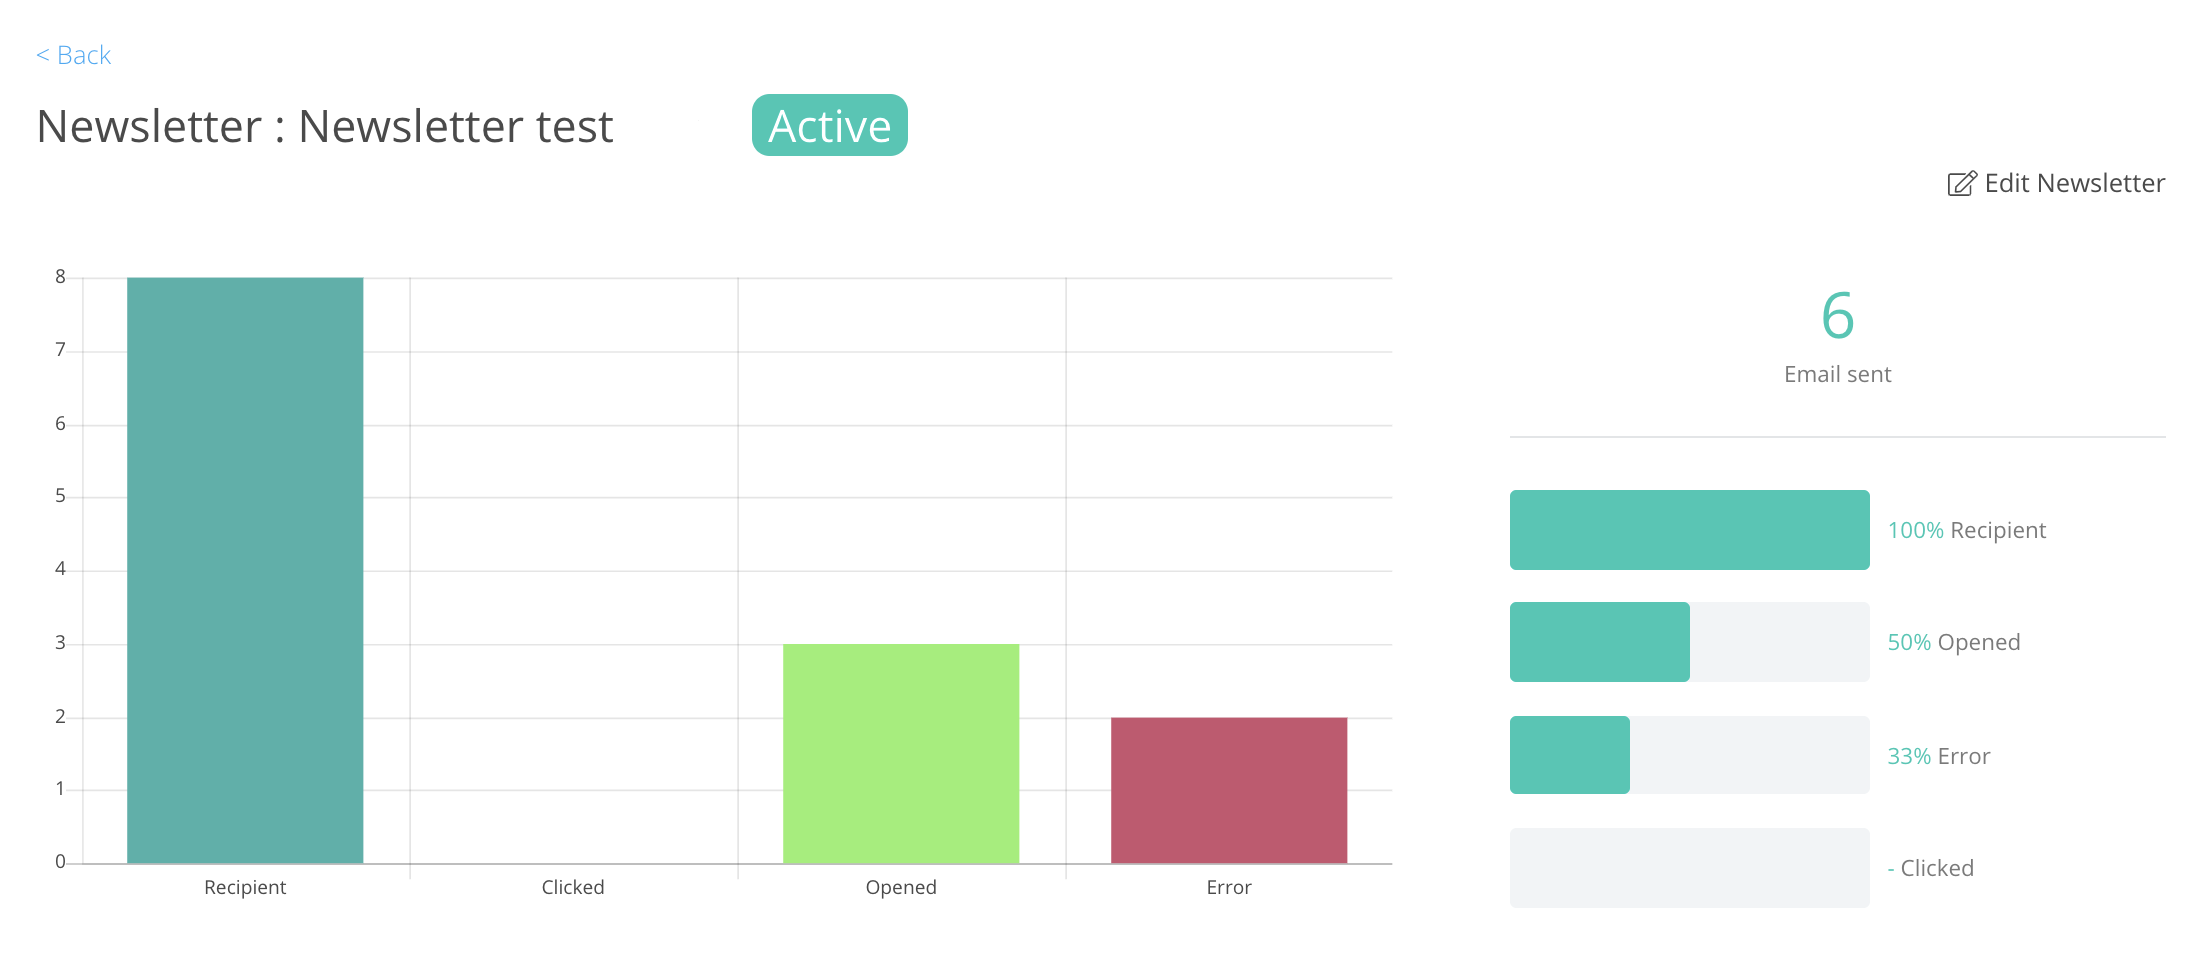
Newsletter Reporting
You can view the status & reporting page of a newsletter by clicking on the name of the newsletter, shown in blue text in the image above.
Managing Existing Newsletters
You can Edit, Clone and Delete your newsletters by selecting the Edit icon (little pen and paper), the Clone icon (doubled sheets of paper) or the Delete icon (trash can) on the far right of the record once it is setup.
Comments
0 comments
Please sign in to leave a comment.