
There are two options for adding records to an email workflow. You can utilize a dynamic Saved view from your Partners or Prospects work-space or you can create your workflow and manually add one or more records at a time from an Action in the list view or Detail page of a record.
The below instructions cover how to manually manage a group of records in your workflow:
Create a new Email workflow with a Manual list:
- Navigate to the Email Workflow section in your Mediarails account by clicking the Automate icon on the left sidebar like shown below.
- To create a new Email Workflow click the blue button on the right side of the page called 'Add Workflow' like shown below.

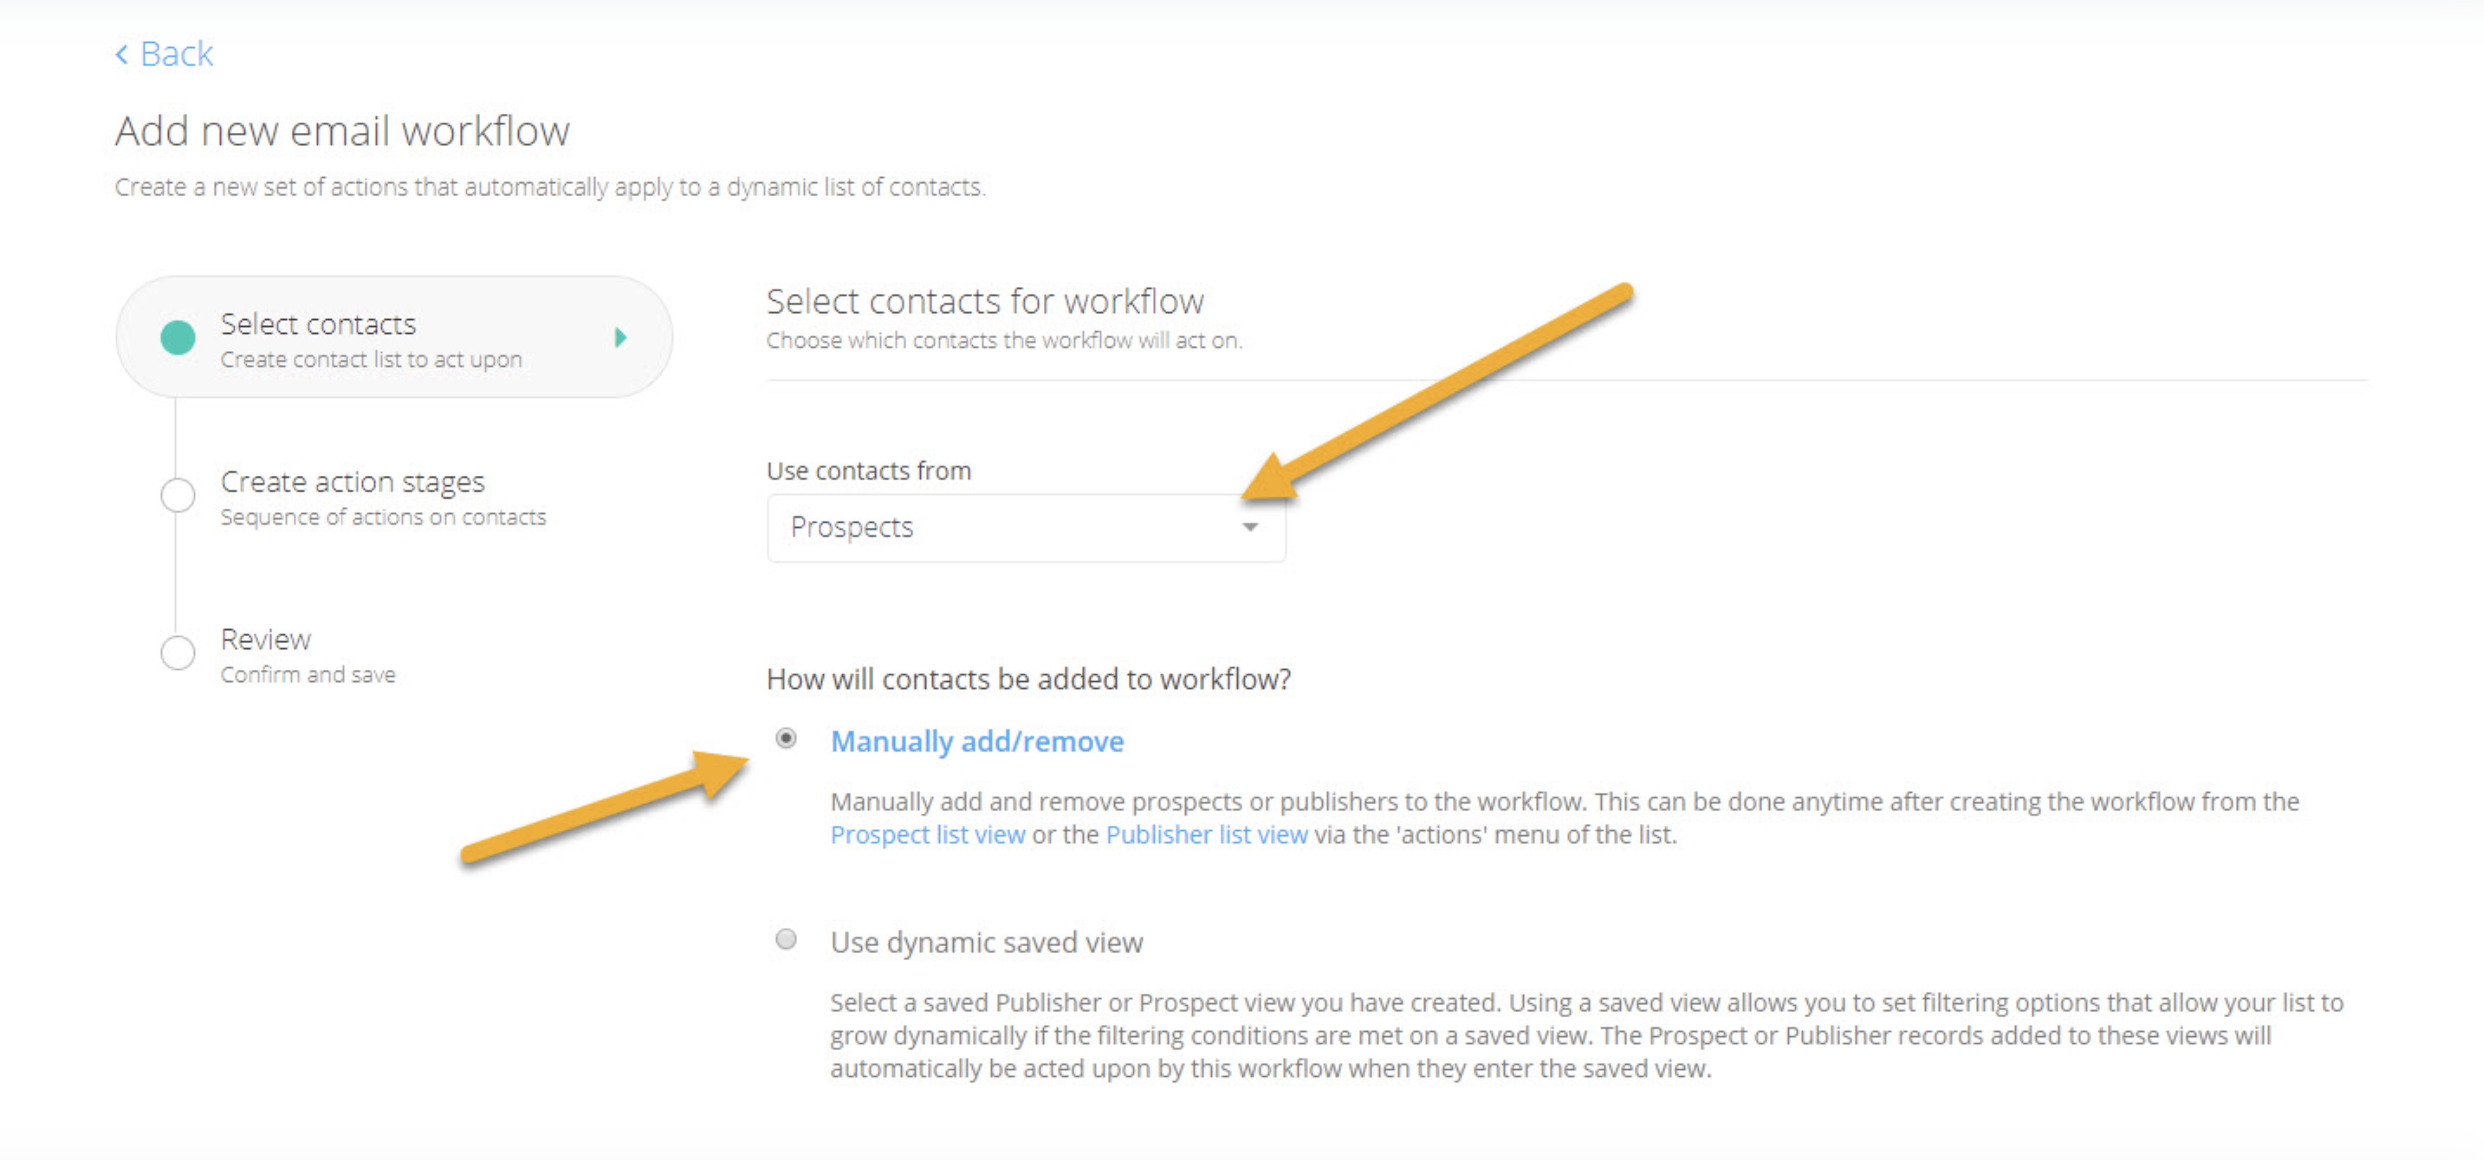
- Once in the Add new email workflow page, click the 'Use contacts from' Dropdown and select whether you want to create your manual workflows from the Prospect database or the Partner database (See below)
- Once you have selected the database you want to add to you workflow from, Make sure the bubble is selected that says Manually add/Remove, then click the blue button that says 'Next' (See below)
NOTE: you do not need to have a workflow set to Manual to be able to manually add or adjust records in it, but we recommend keeping these types separate for until you get the hang of it.
Create the emails for your Email workflow and save:
- Enter your first email that will be sent out to all emails in the workflow, add any other email stages by selecting the 'Add another stage' Button under the email input box.
- Once you have created all the email stages that you want, Click the blue 'Next' button in the bottom right hand side of the page.
- After creating your email stages you will move to the Review section of the workflows, here you will create a Workflow Name for your workflow that you are going to manually add Prospects/Partners to.
- Fill out the Daily email limit, and adjust the time frame your emails send out just like a normal workflow. Once you have adjusted your Final workflow options. Click the Blue button that says 'Save Workflow' Located in the bottom right of the page.
Adding/Editing records for your new Email workflow:
- Go the the workspace (Partner/Prospect) you selected in the Workflow: Now that this Email workflow has been created you can manually add/remove records in the List views (Partners or Prospects). For this example we will use the Partner space as the example but the steps are exactly the same
- Navigate to the records you want to use: Once you find the specific records that you want to manually add to a list, click their check box on the left side under the Action column. if you have added multiple filters and you want to select a large list you can click the 'Actions' button in the upper left and click 'Select All'.
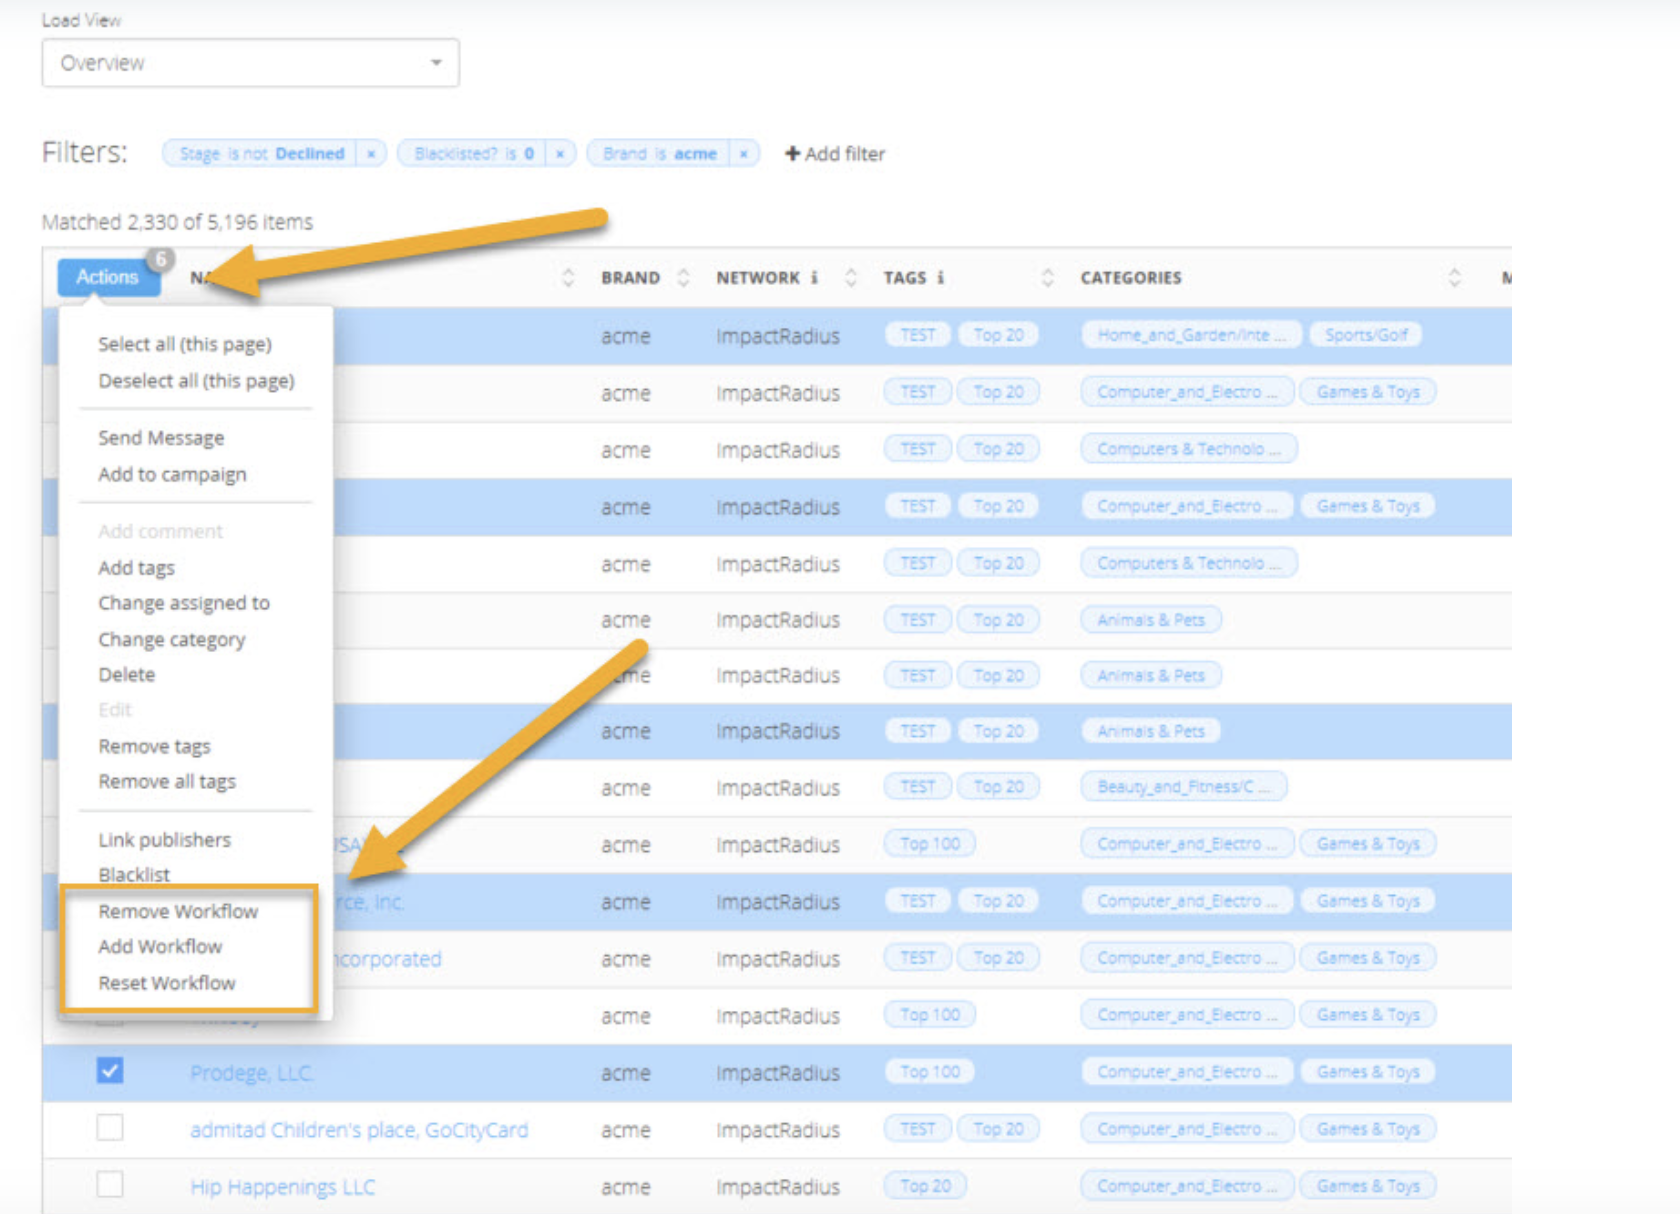
- Once you have selected your records that you want to manually add to your new workflow, Click the 'Actions' button and you can see the three newly added actions that you can select. Add Workflow, Remove Workflow, and Restart workflow.
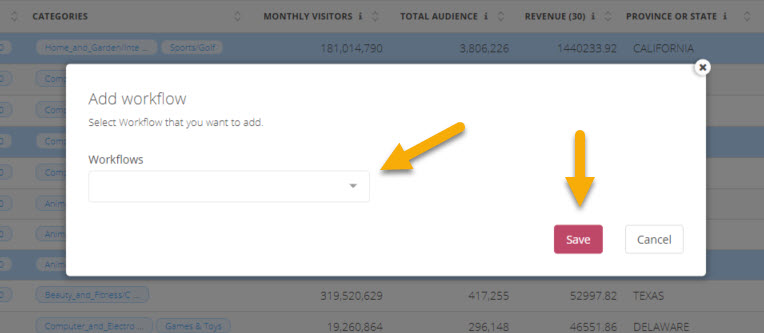
- Add Workflow: Once you click the 'Add Workflow' in the Actions drop down, a small window will popup where you will select the workflow that you want to add these specific records too. Once you click the workflow that you want to add these records to. Click the red save button in the bottom right of the pop up.
- Note: if you do not see the workflow you created in this list you might not have chosen the correct work space when you were setting it up.
- Remove Workflow: Very Similar to the 'Add Workflow' action. Click the drop down and select the workflow that you wish to remove the specific records from. Click the red save button in the bottom right once you have selected the workflow you wish to remove these records from.
- Note: Once you use this action to remove a record from the workflow. It essentially blocks this record from that specific workflow and can never enter this workflow again
- Reset Workflow: Reset workflow can be very helpful if you have emails in a workflow that don't get sent because it had bad contact info. If you find a new contact for that record, You can edit the contact info to that record and then you can select that same record and and click the Reset workflow action. This record will go back through the beginning of the workflow even if it has ran before and attempt to send the emails to the new contact info in these records that you reset.
- Note: Make sure you verify the current workflow this record is assigned to by looking in the Workflow column in the list view in case you had this in multiple workflows
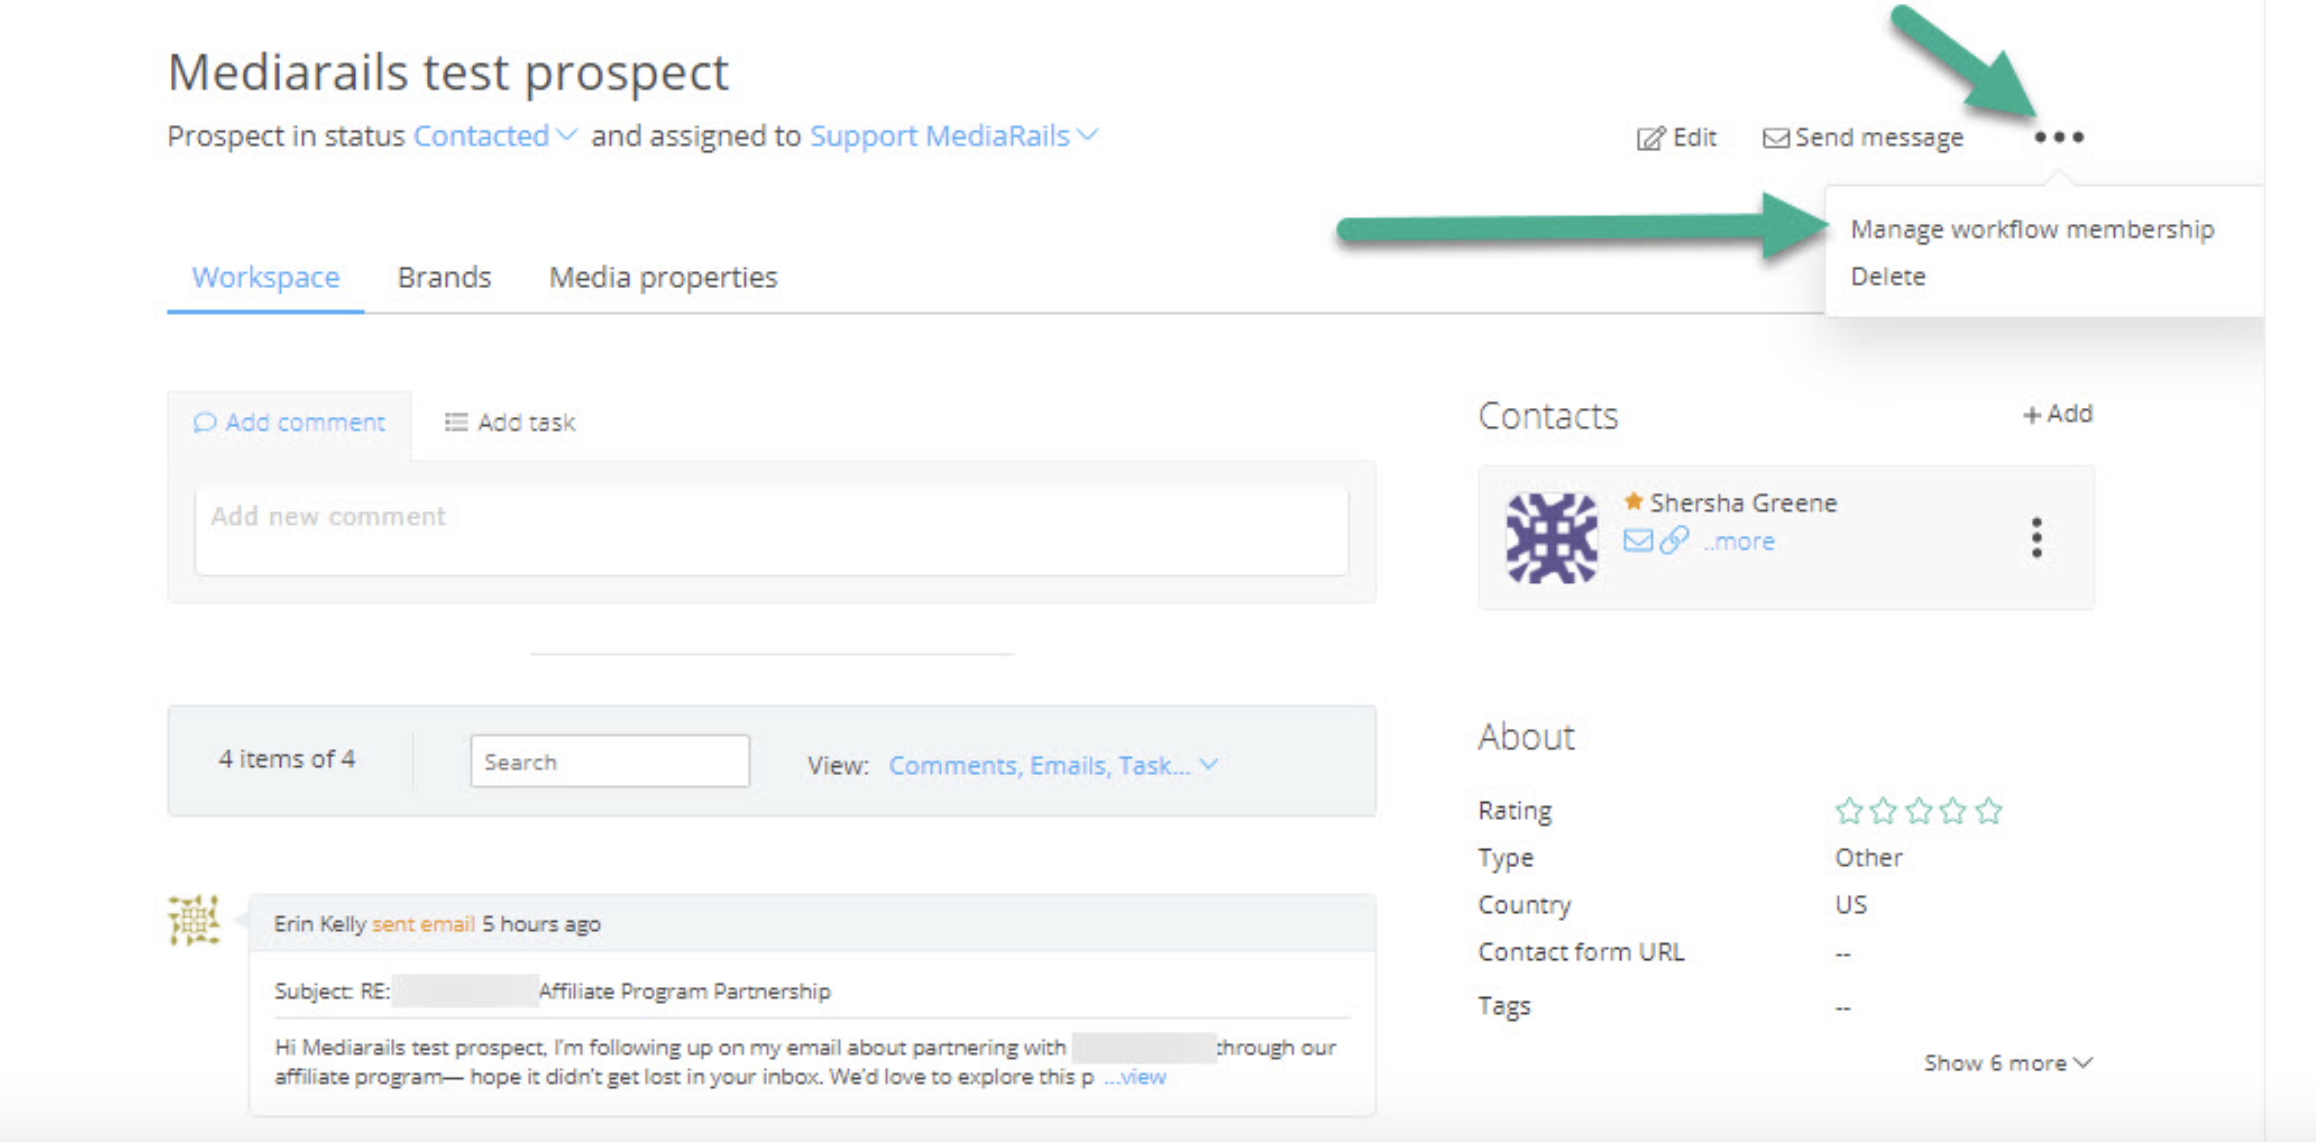
In addition to adjusting records from the list view you can also do this from the detail page of an individual record. See below for location of these options:
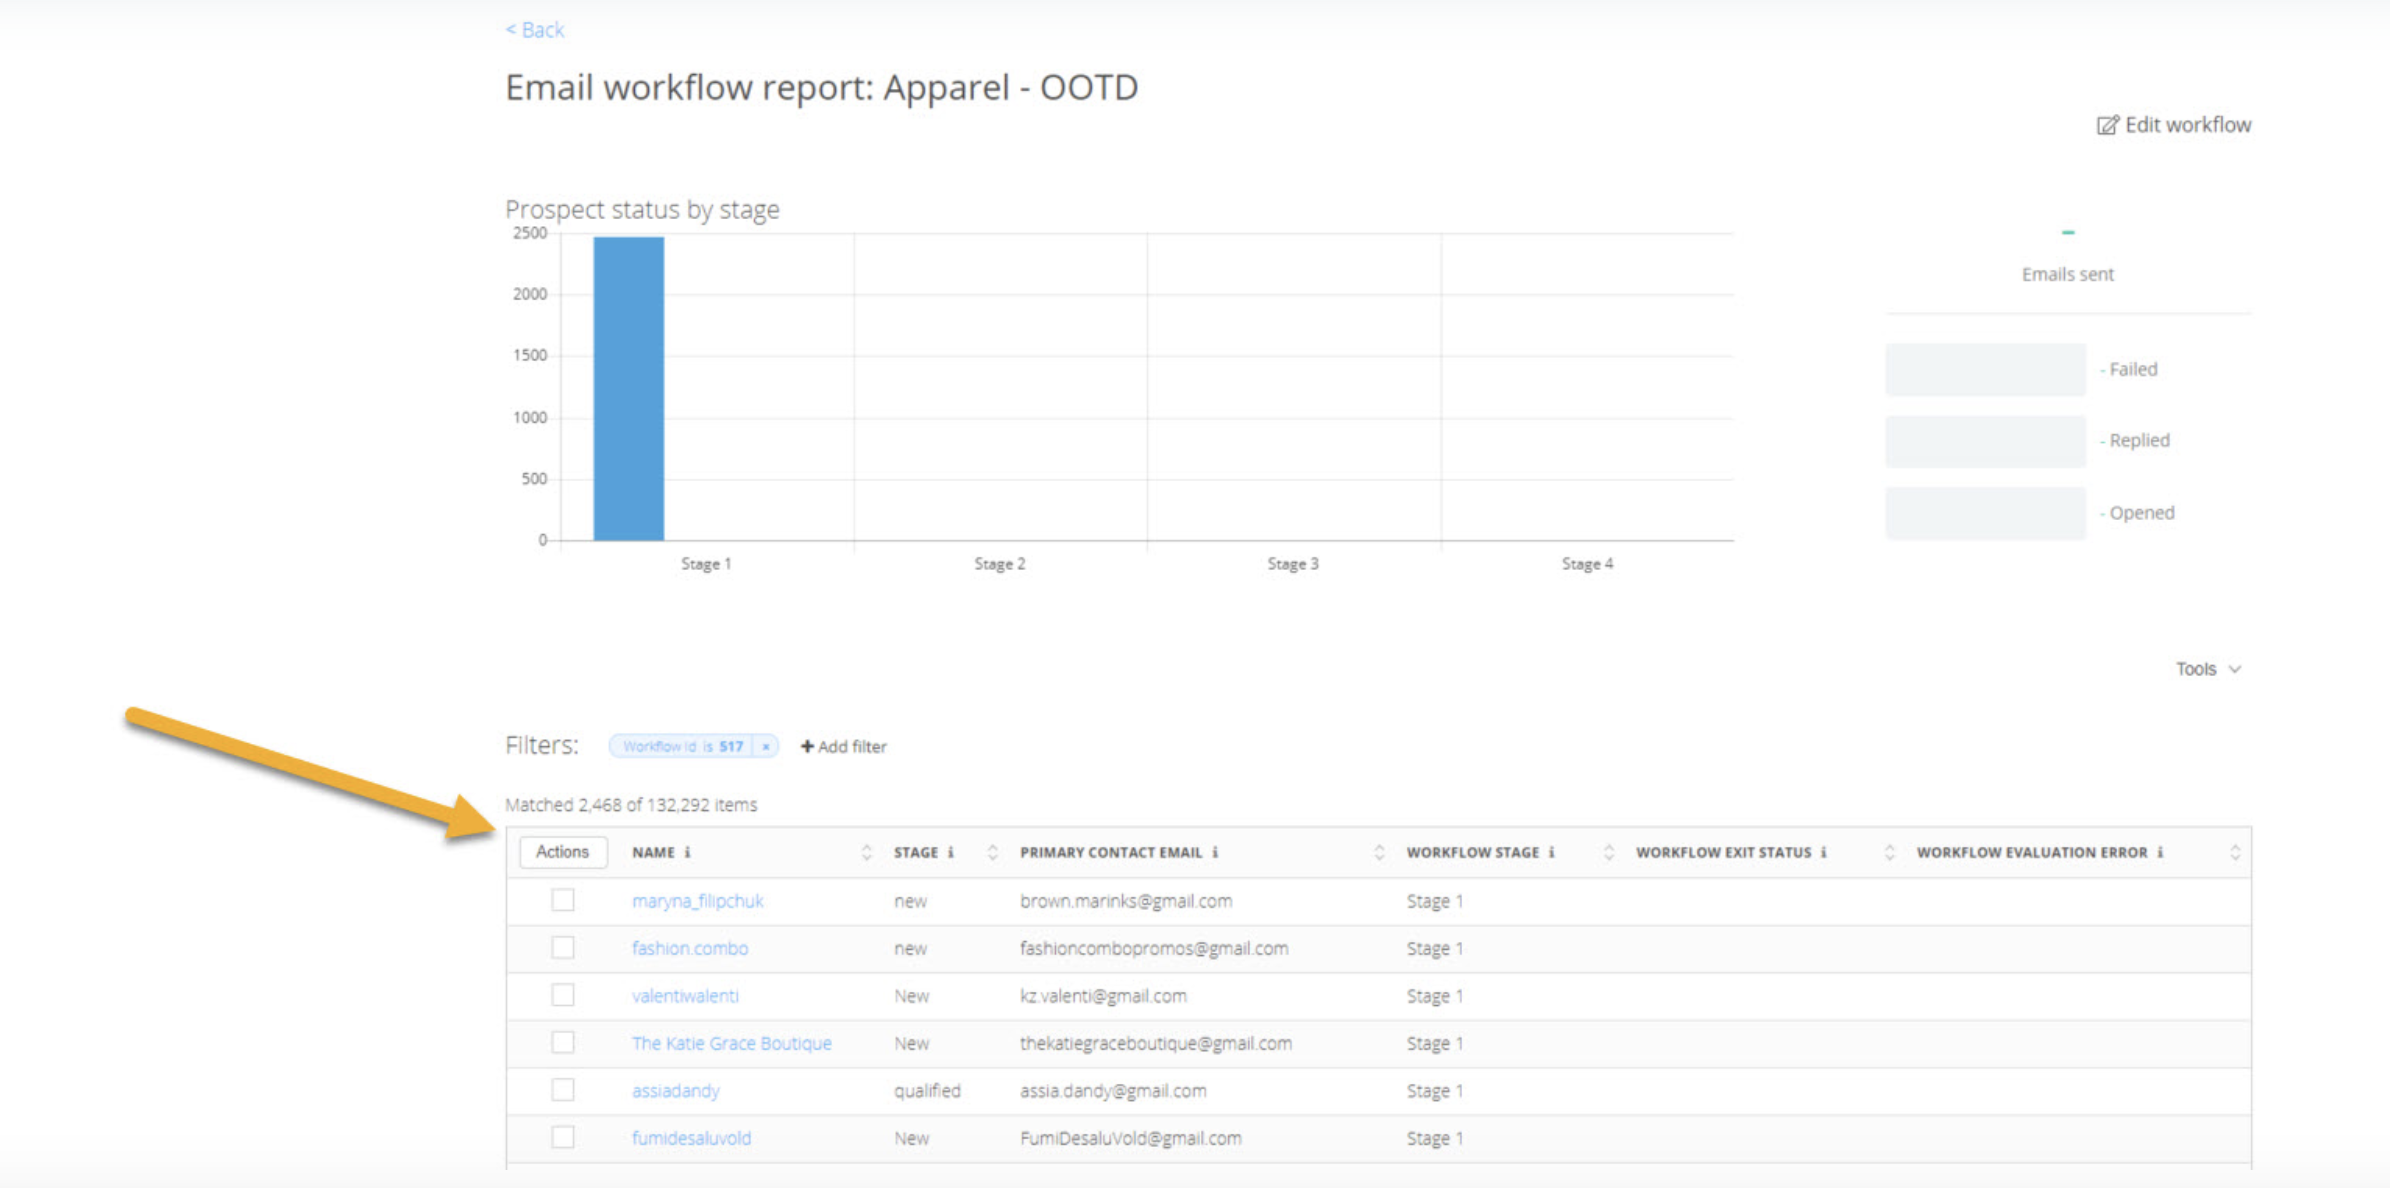
TIP: once you add records to your workflow, you can manage the list in the workflow page, You can remove and reset from the list view in this page. To get here you simply click the name of the workflow in the Email workflow list:
Comments
0 comments
Please sign in to leave a comment.